

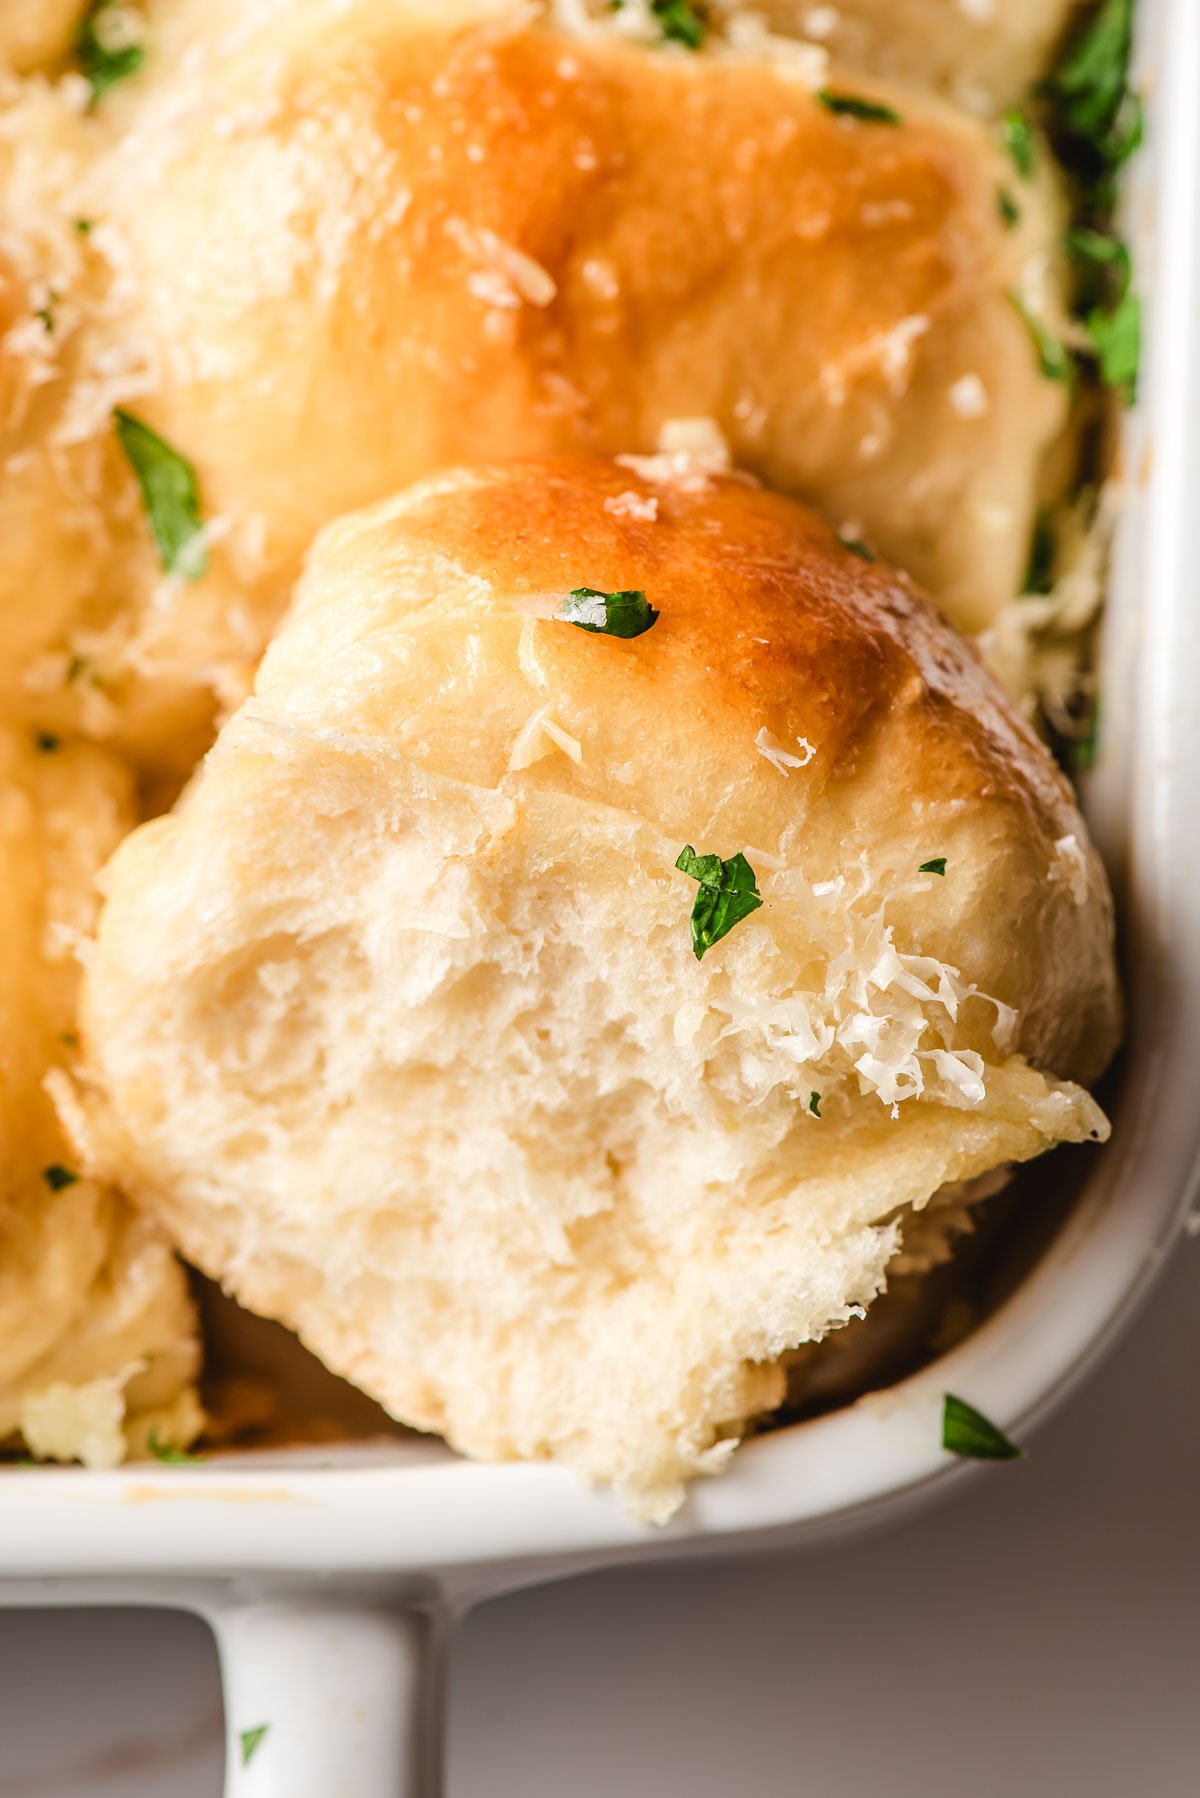
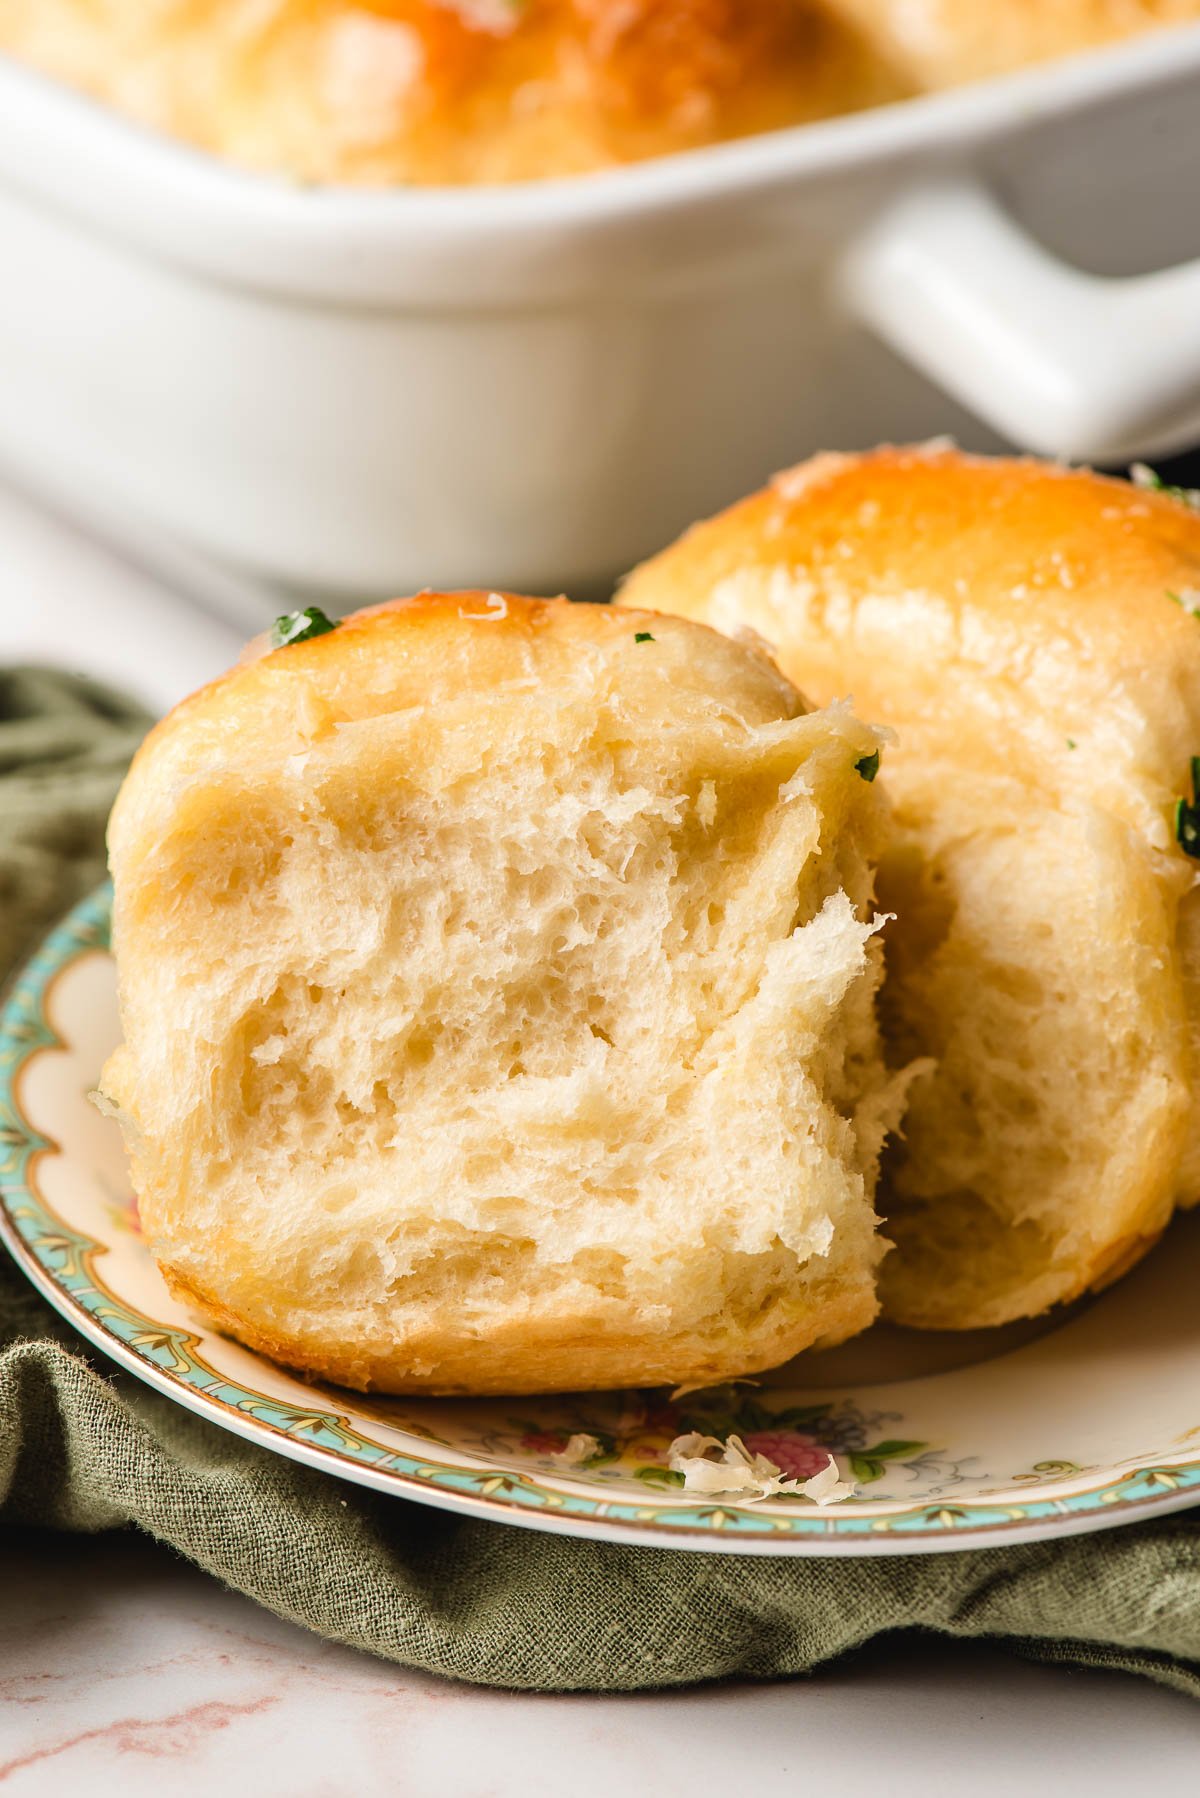
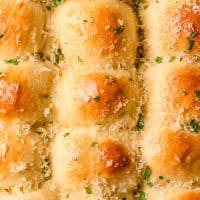
Easy Garlic Dinner Rolls are fluffy, soft, buttery, and loaded with garlic flavor. Topped with homemade garlic butter, Parmesan cheese, and fresh parsley, these rolls will steal the show at any gathering!
This recipe is easy enough for a weeknight but special enough for holiday celebrations. Save it to go alongside other holiday classics, like Oven Roasted Turkey and Creamy Mashed Potatoes!

Table of Contents
Easy Garlic Butter Dinner Rolls
The first time I tested these rolls, they were good rolls, but they weren’t garlic rolls. They tasted like classic dinner rolls topped with garlic butter, which certainly isn’t a bad thing, but it wasn’t the vampire-repelling garlic flavor I was hoping for.
It took a few more attempts, but we finally made a Garlic Dinner Roll that feels worthy of the name. These rolls are all the things you want–tender, flaky, buttery–but with an infusion of garlic flavor in the dough, on top, and in all the little nooks and crannies. In a word, they’re dreamy.
As far as yeast breads go, this one is fairly easy and great for beginners! Just two short 30 minute rises are all you need to get these beauties into the oven. And if you’ve got a stand mixer, it will do most of the work for you!
We’ve included all the tips for baking these ahead of time, so you can fit them in with the rest of your Thanksgiving menu. I hope you love them as much as we do!
CourtneyKey Ingredients
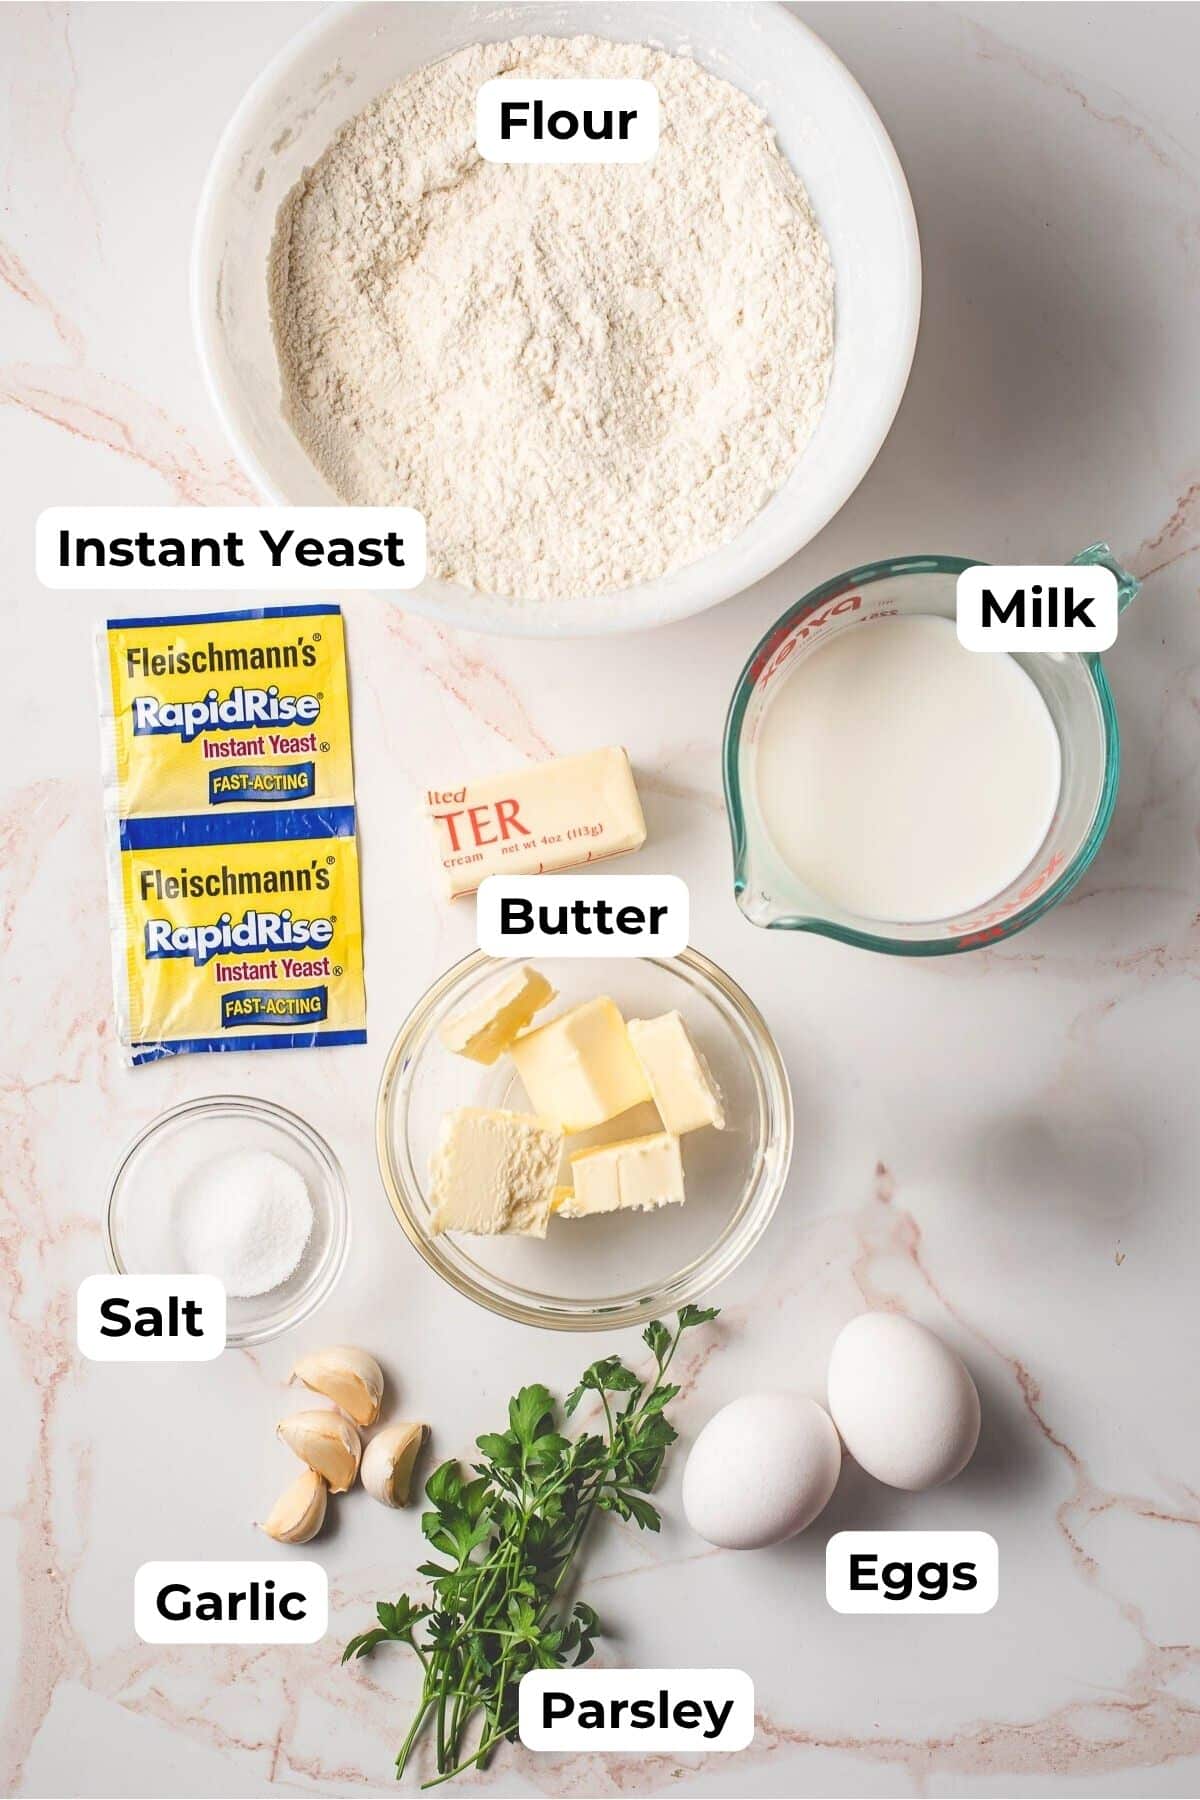
- Butter– This recipe starts with a big batch of garlic butter. Part of it will be used in the dough itself, and the rest will be poured on top after the rolls are baked. I prefer to use unsalted butter for this recipe.
- Garlic– If possible, use fresh garlic instead of pre-chopped garlic. We’ll use 6 cloves, or about 2 Tablespoons of minced garlic.
- Flour– All purpose flour yields soft and tender rolls. Be sure to use the spoon and level method for measuring flour so you don’t get too much.
- Yeast– This recipe was tested with fast rise instant yeast. I love using instant yeast because it doesn’t have to be proofed and can be mixed directly with the rest of your ingredients. It also usually has shorter rise times. If you substitute regular active dry yeast, you will need to proof it first by mixing it into 1/4 cup of the warm milk with a Tablespoon of sugar and allowing it to sit for ten minutes, or until it’s frothy. Then, you can proceed with the recipe. You will likely also need an extra 15-20 minutes for each rise.
- Sugar– Sugar might seem like a strange addition for a savory roll, but I promise it doesn’t make the rolls sweet. Sugar helps activate the yeast and also gives these a balanced super delicious flavor.
- Salt– I use table salt for this recipe. If you’d like to use Kosher salt, increase the amount to 2 teaspoons.
- Milk– I recommend using whole or 2% milk for this recipe.
- Egg- Eggs add moisture to the bread dough. I also use an egg wash to create the shiny, brown glaze on the rolls.
Please see the recipe card below for a full list of ingredients and instructions.
How to Make Garlic Dinner Rolls
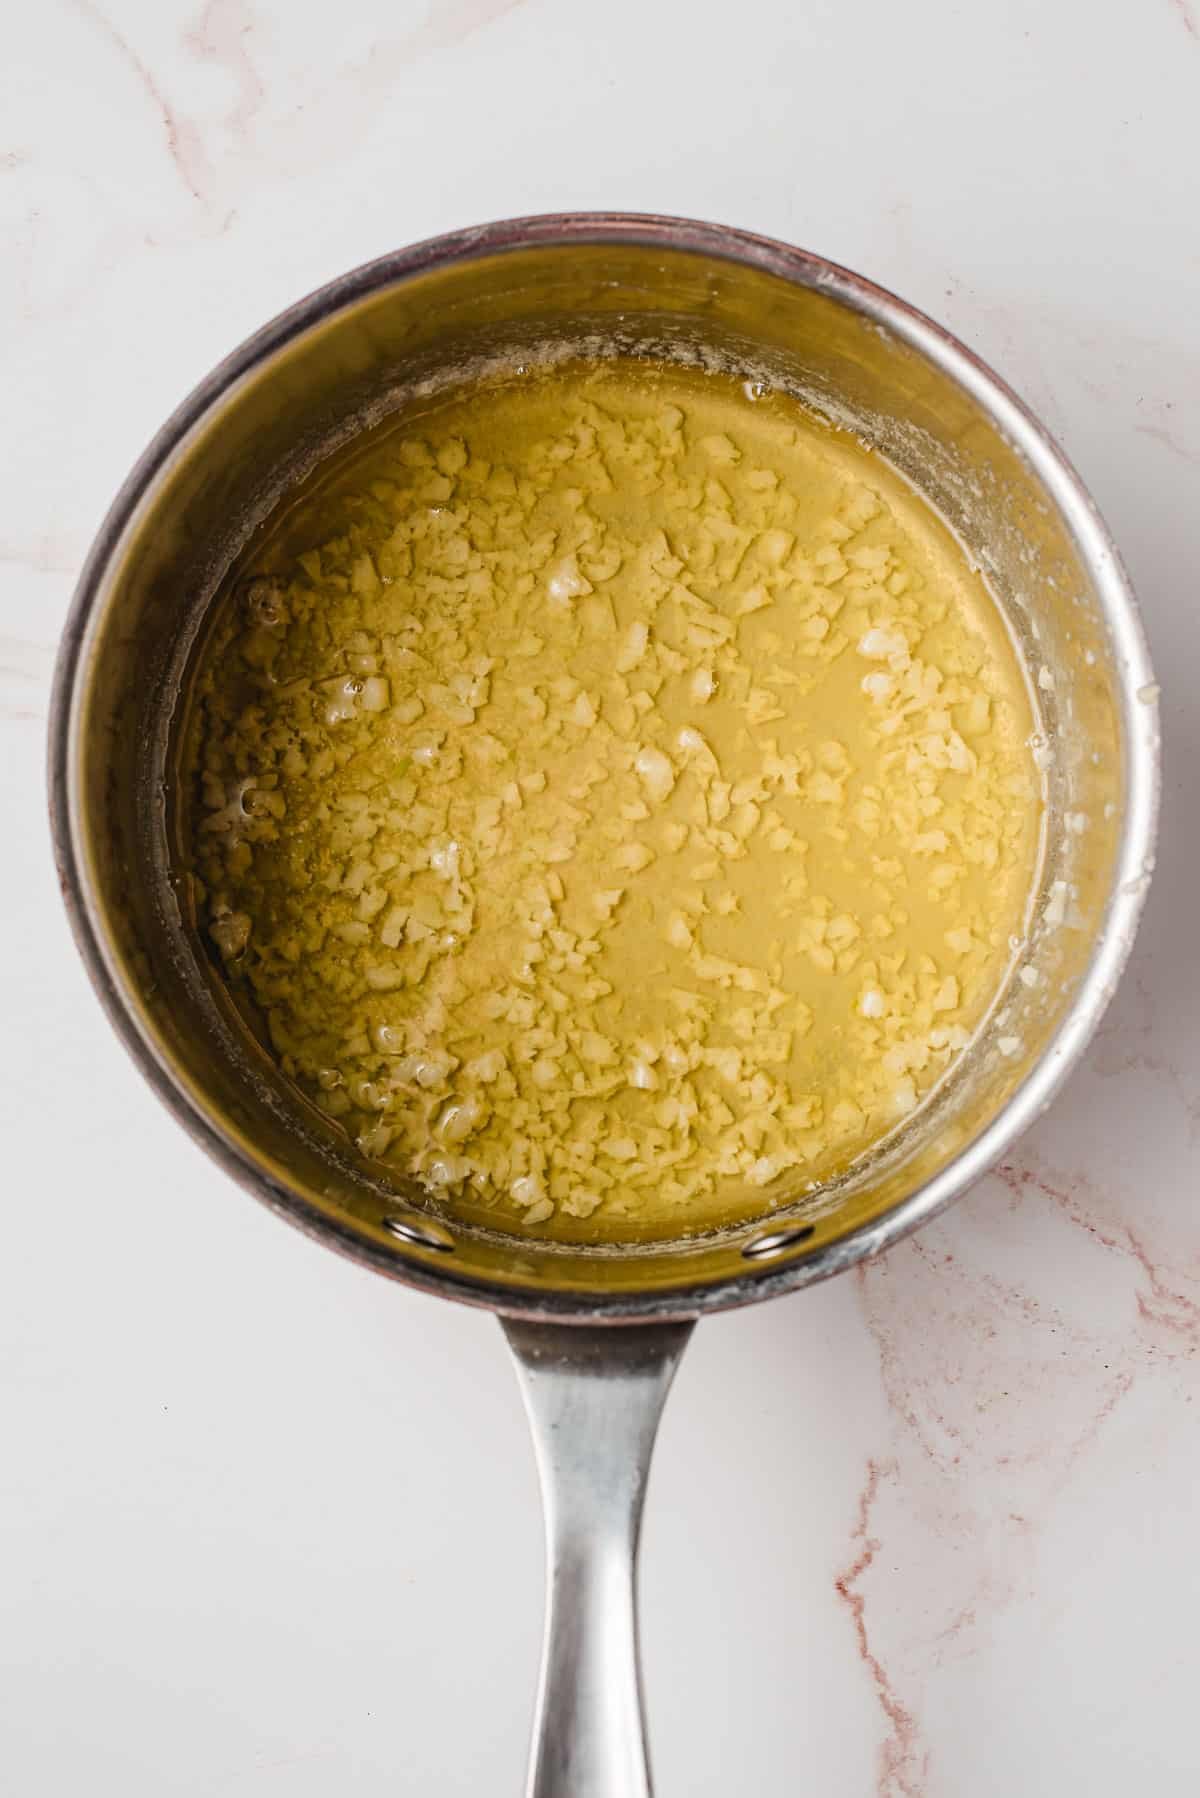
Step 1: Make the garlic butter. Melt the butter in a sauce pan over medium low heat, then add garlic. Cook for about a minute or until the garlic is fragrant. Remove 1/3 cup of the butter + a decent amount of the garlic to a measuring cup. Pop a lid on the remaining butter mixture and set it aside for later!
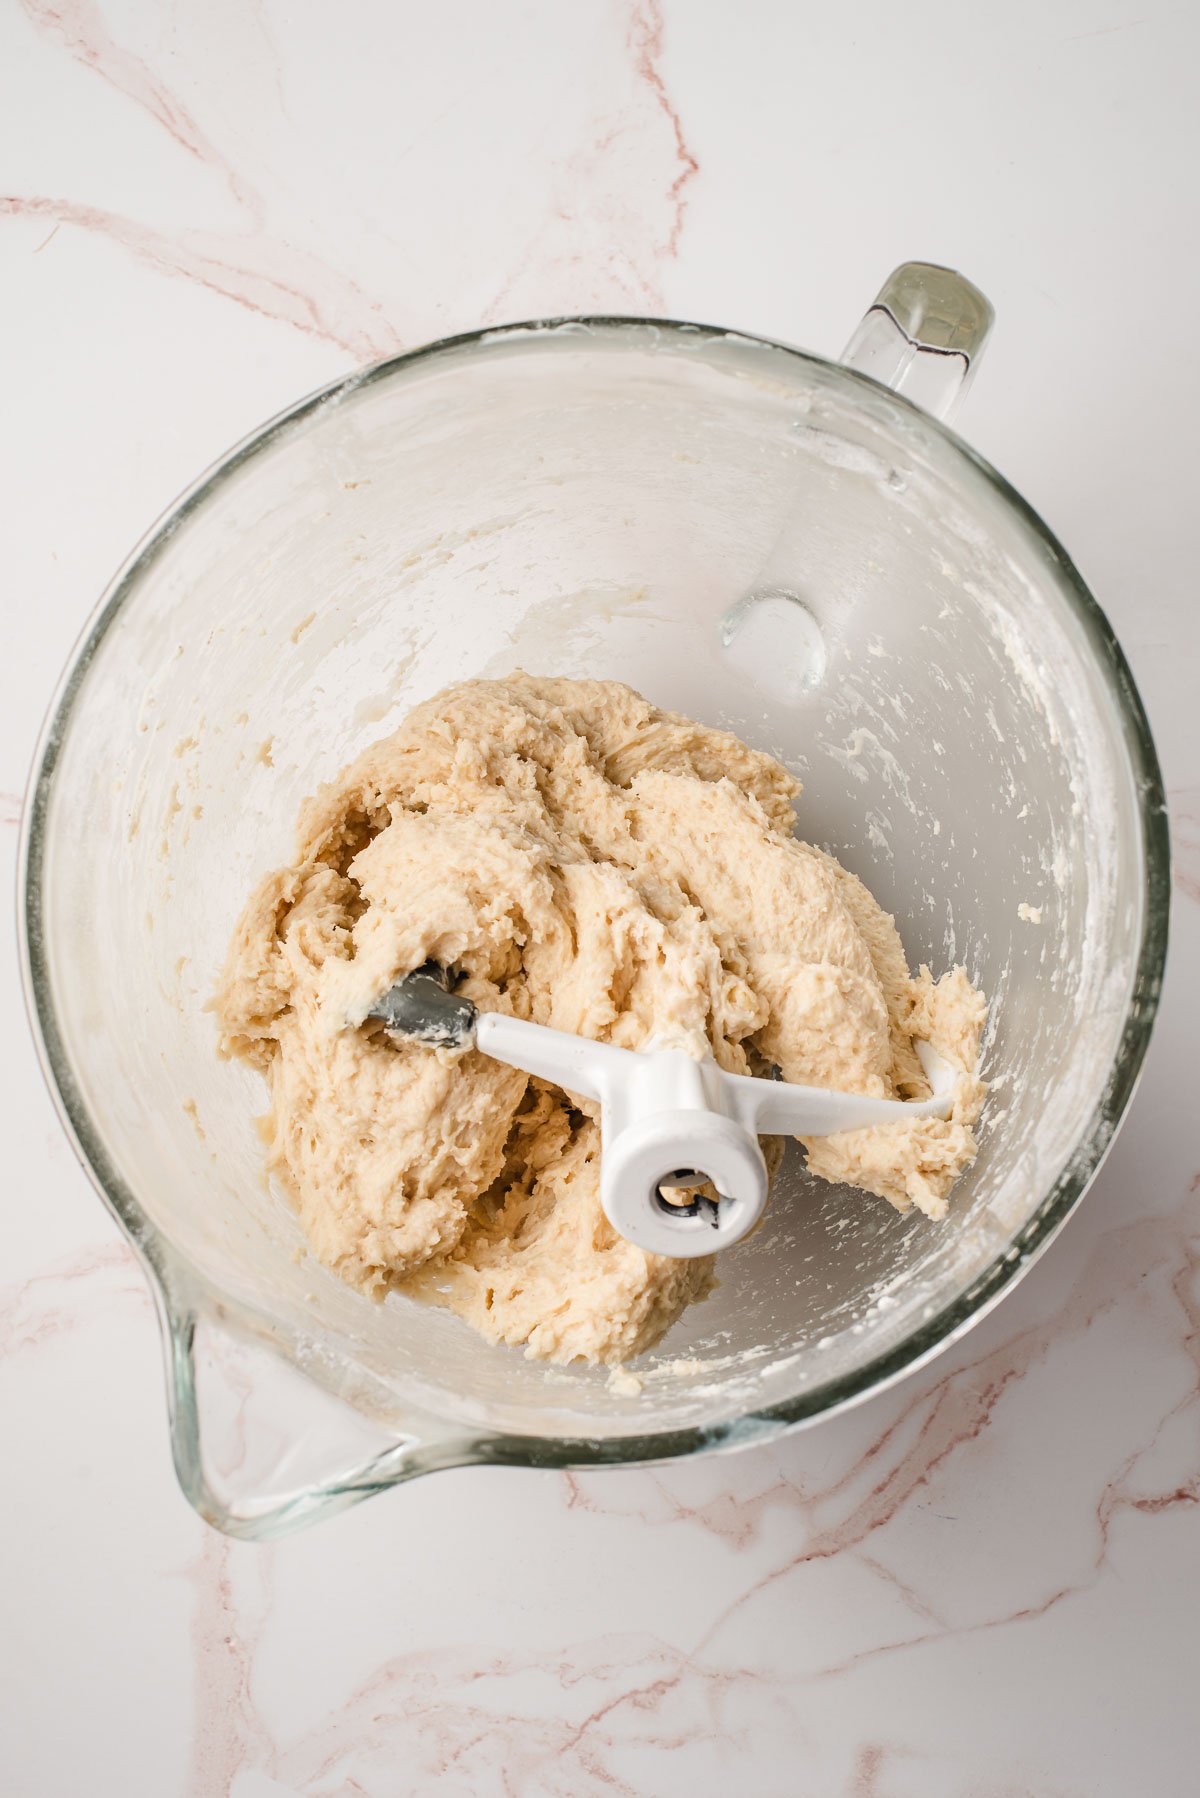
Step 2: Make the dough. While the butter cools, add 3 3/4 cups of flour, yeast, sugar, and salt to the bowl of a stand mixer and mix on the lowest setting until combined. Add the warm milk, ⅓ cup of the warm (not hot!) melted garlic butter, and egg and beat on low speed until flour is just combined.
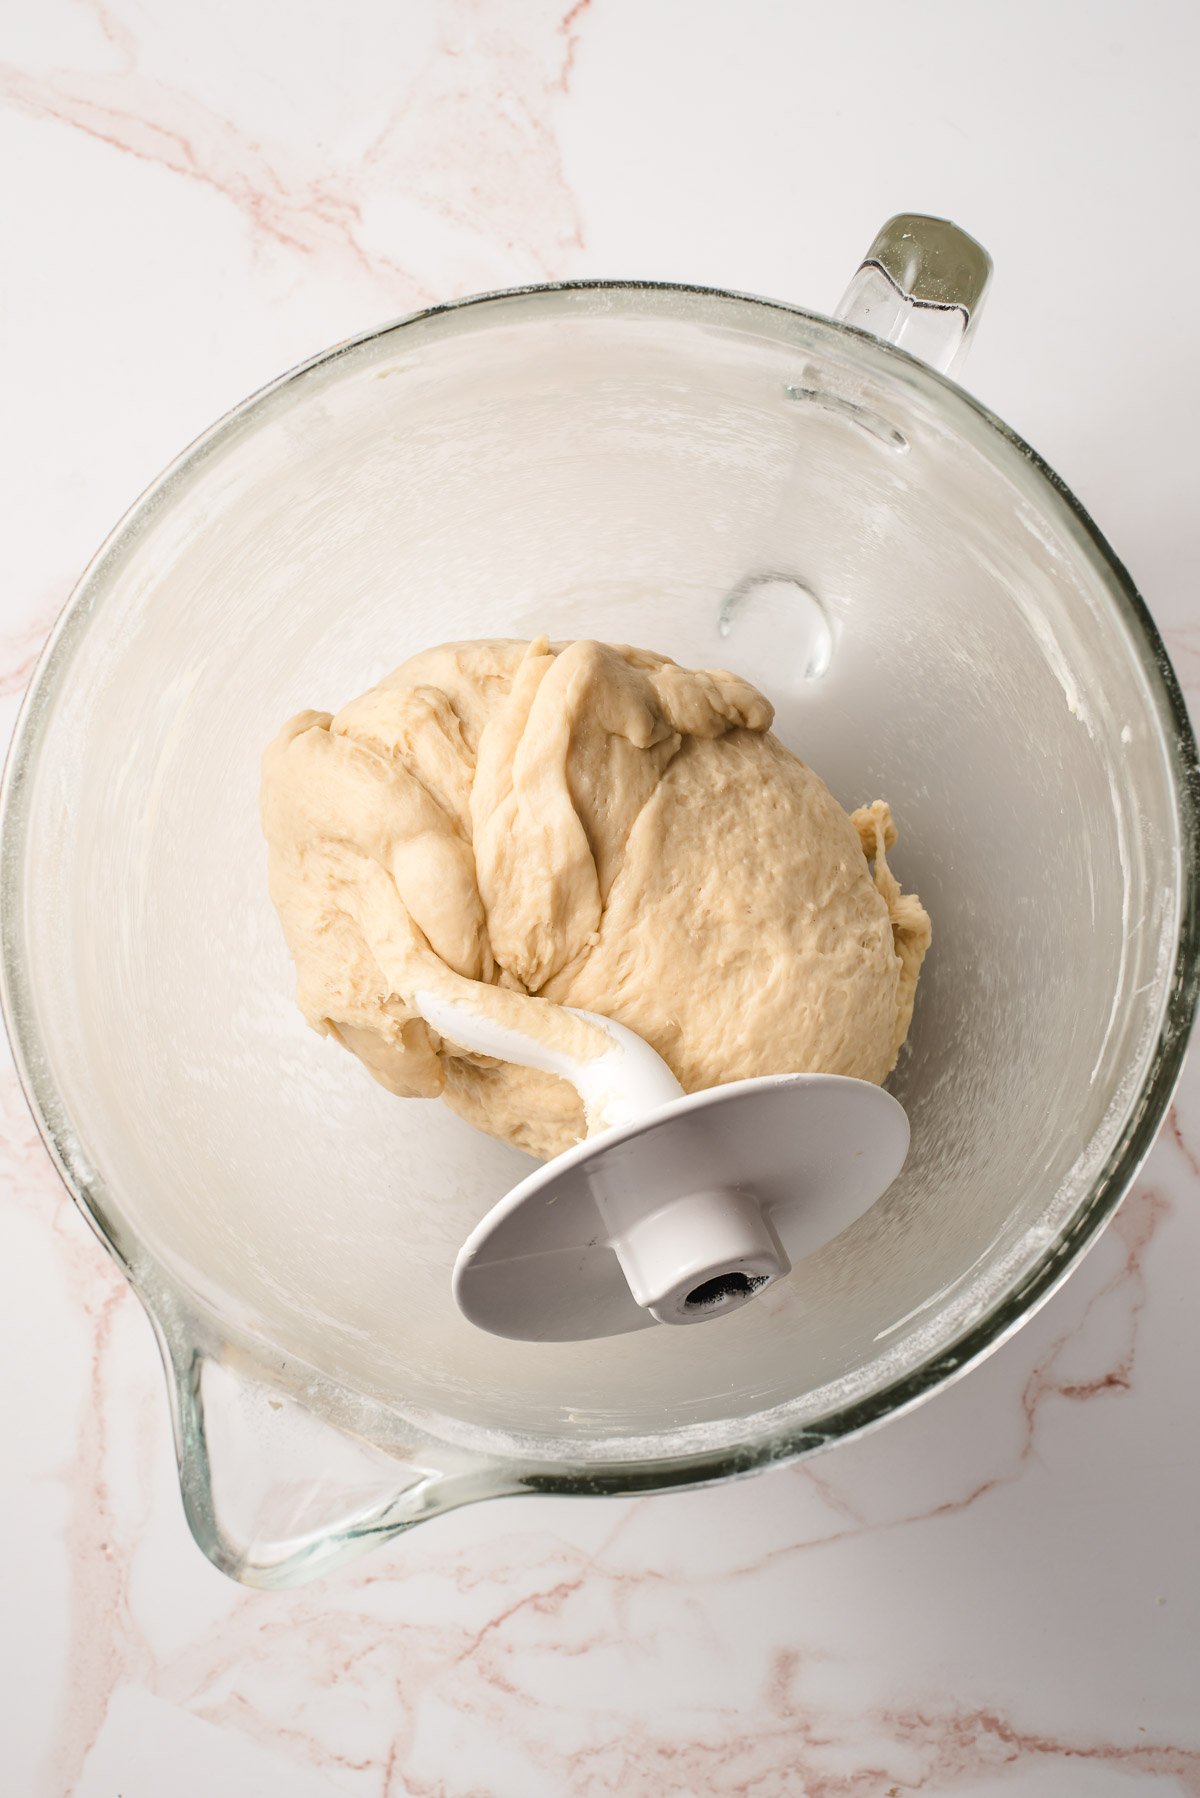
Step 3: Knead with the mixer. Switch to the dough hook and increase the speed to medium. Beat for 2 minutes. Scrape the sides of the bowl and the hook, then beat again on medium speed for about a minute. At this point, the dough should begin pulling away from the sides of the bowl. If the dough is still quite sticky, add flour, 1-2 tablespoons at a time, until it is tacky but no longer sticks to your fingers, beating well after each addition.

Step 4: The first rise. Transfer the dough to a greased bowl and loosely cover with saran wrap or a towel. Let the dough rise in a warm-ish spot for 30 minutes, or until doubled in size.
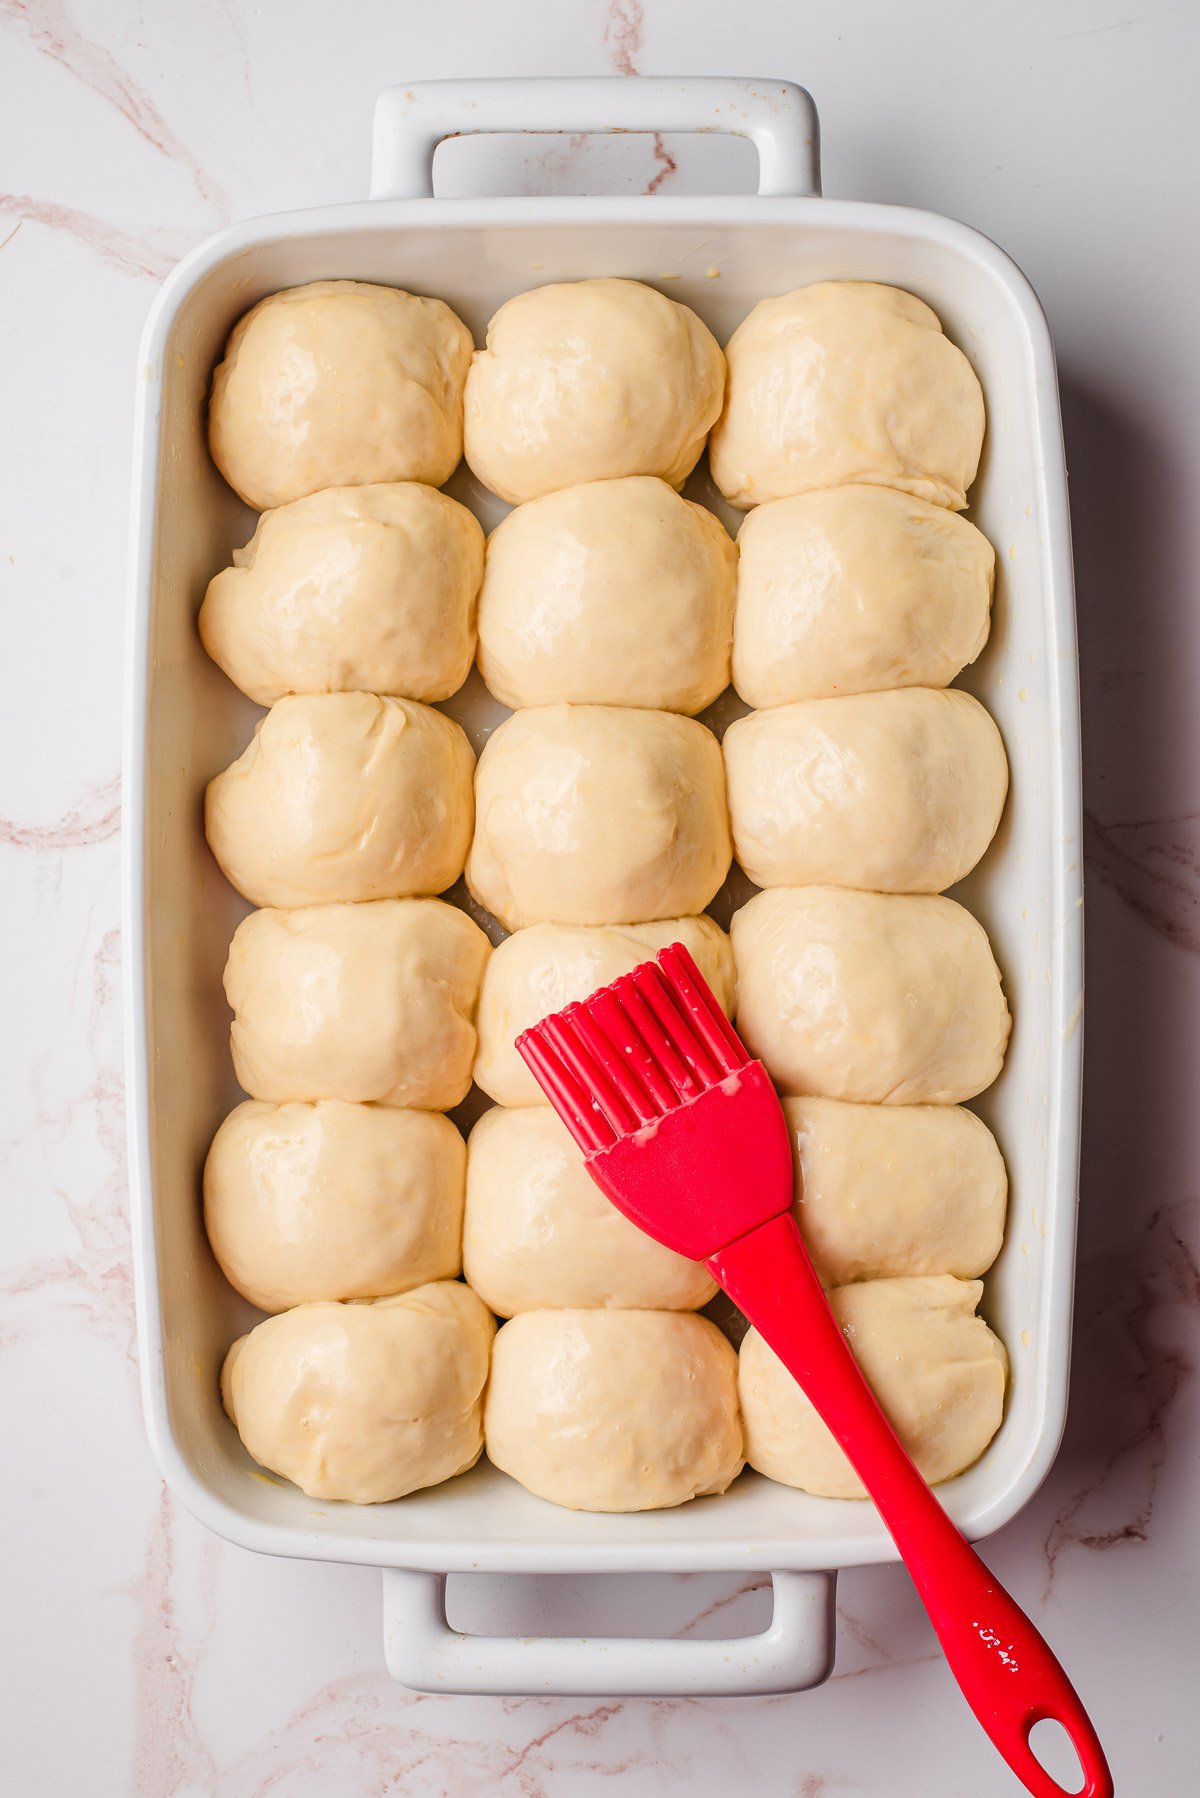
Step 5: Shape + Second Rise. Lightly punch the dough to release any air bubbles. Grease a 9 x 13 inch baking dish with non-stick spray. Pinch equal portions of dough off and form them into balls, about 2 inches around. Line them up in the prepared dish, re-cover, and place back in a warm spot to rise for another 30 minutes.
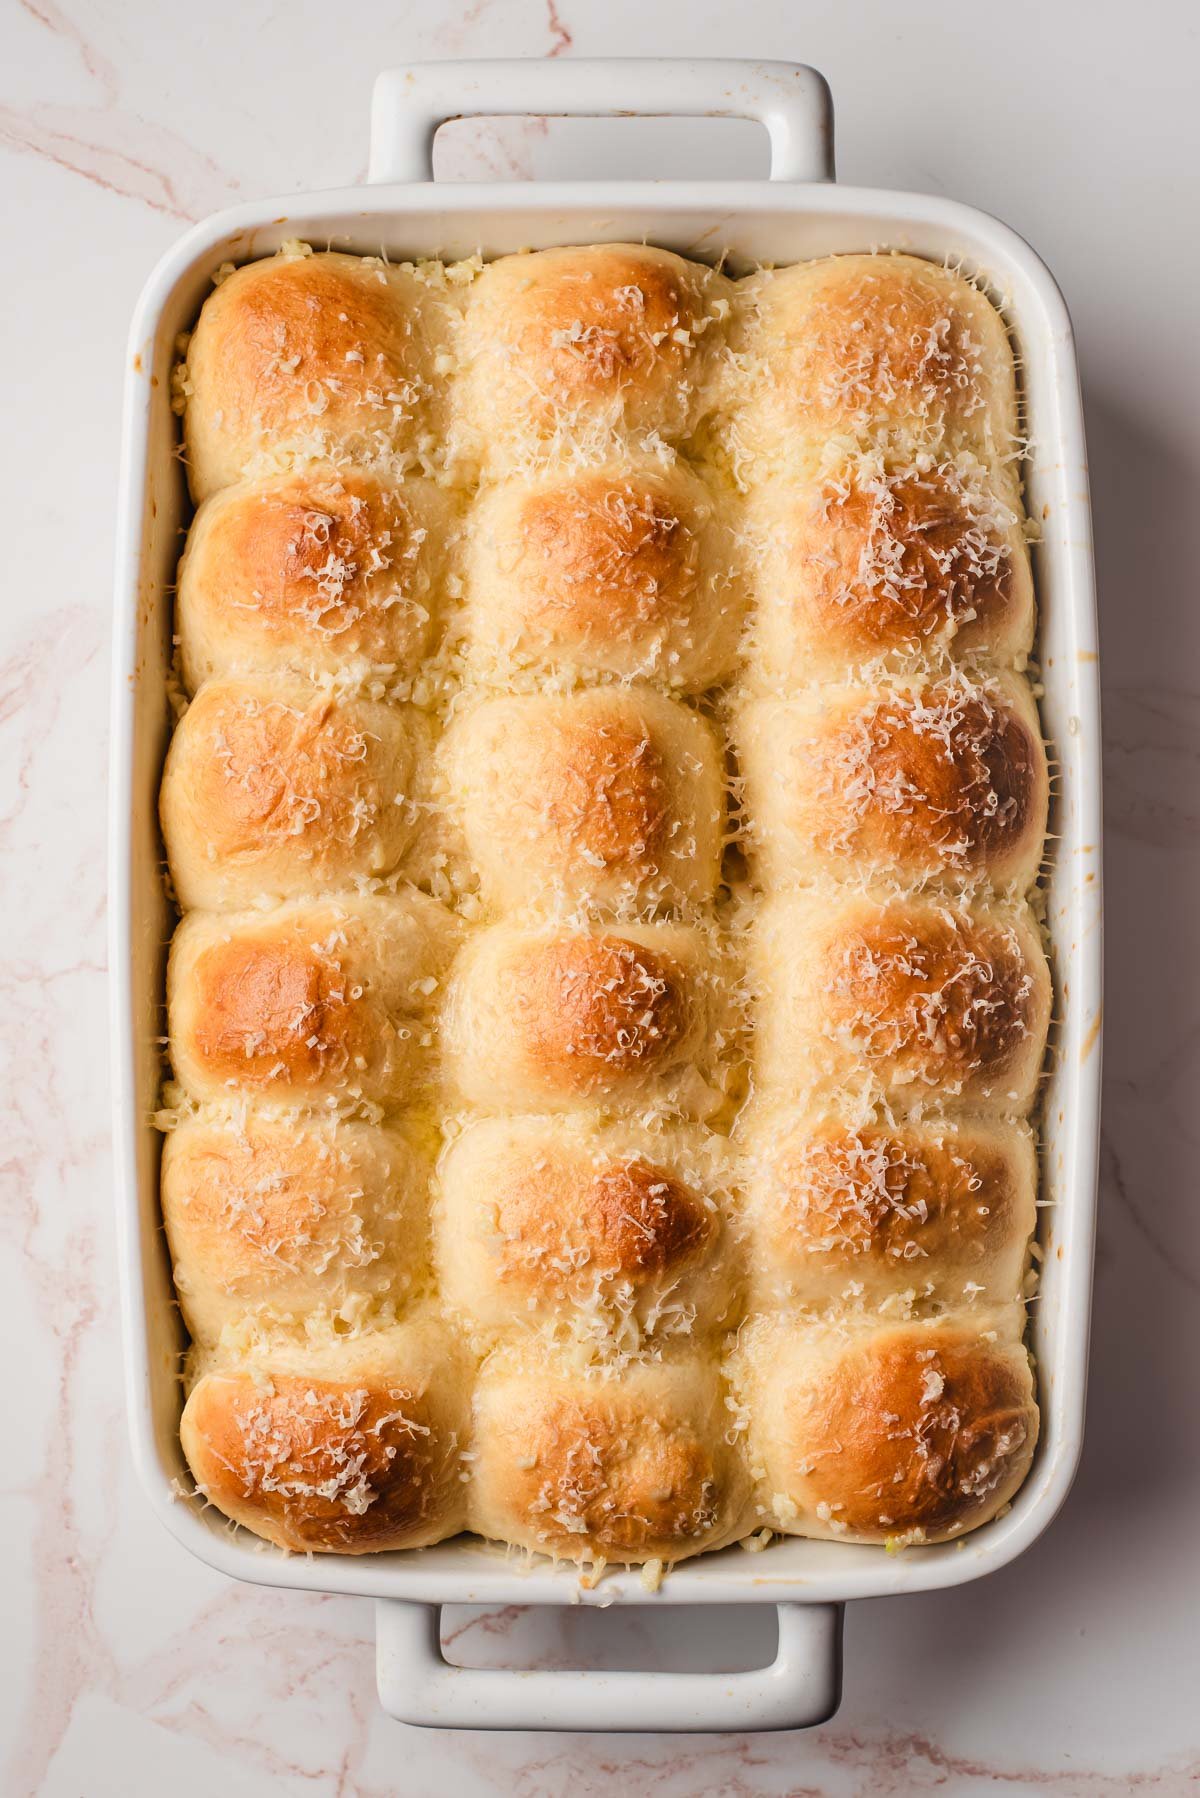
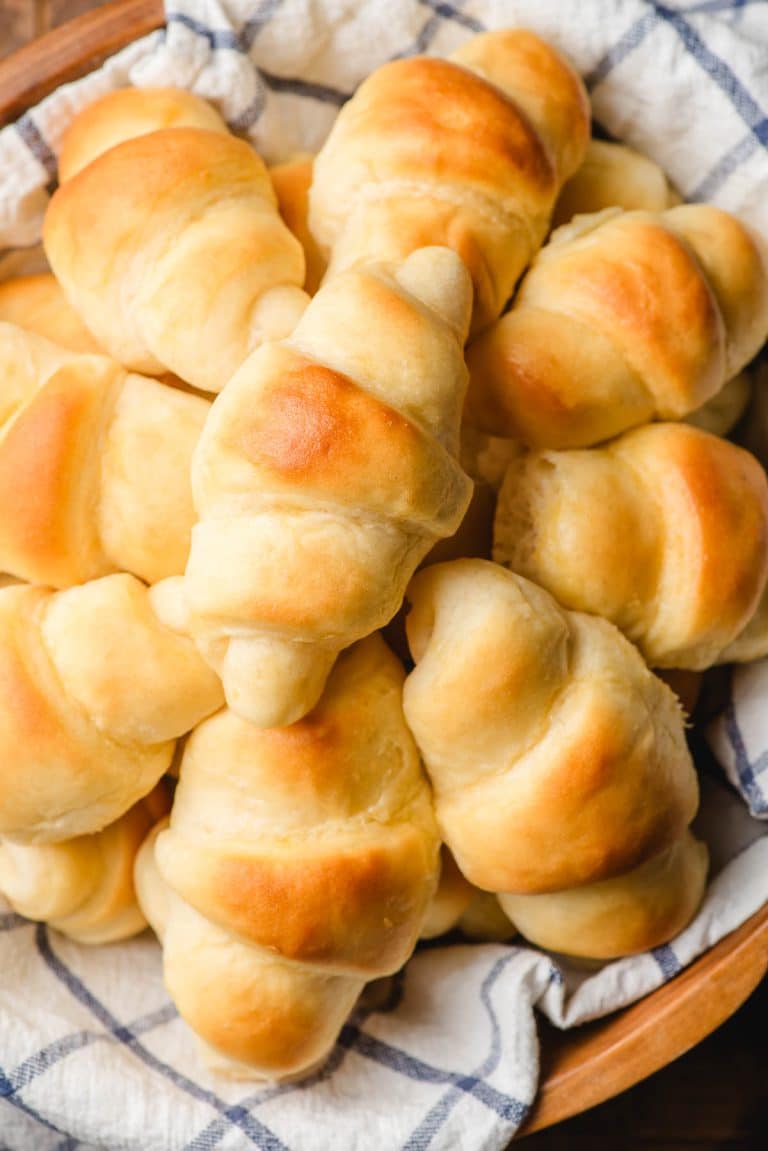
Step 6: Glaze and Bake. Preheat the oven to 375 degrees. Whisk together the egg and Tablespoon of milk, then brush it on the top of the rolls. Bake for 12-14 minutes, or until the rolls are glossy brown on top.
Recipe Tips & Variations
- Use a thermometer or the “wrist test” to make sure your ingredients are at the right temperature. Liquids should be between 105 and 115 degrees when incorporated with the dry ingredients in order for the yeast to activate. To test with your wrist, place a few drops of the warm milk or butter on the inside of your wrist. If it feels warm but comfortable, you’re in a good spot. If it feels hot, you need to let it cool a bit longer.
- Be as precise as (or not) as you want. If you want very precise, professional rolls, use a kitchen scale to make them the same size. To yield 18 rolls, yours will need to be about 2 ounces each. That said, it’s okay if there’s a little variation in the size or if you get 16 or 20 rolls instead of 18.
- Tips for shaping rolls: Fold or tuck the edges of the dough under itself to create a smooth top, then roll it between your palms for a few seconds to form a smooth ball shape.
- Choose a different baking pan. This makes 18 rolls, which can be baked in a 9 x 13 inch casserole dish or in two pie plates or square pans. The second option works great if you would like to freeze or gift one pan.
Storage, Freezing, & Make-Ahead Instructions
- Storage: Wrap leftovers tightly with plastic wrap and store at room temperature for up to 2 days.
- Reheating: Cover with foil and place in a 350 degree oven for about 8-10 minutes, or until warmed through.
- Freezing: Wrap the baked rolls tightly in a double layer of plastic wrap or plastic wrap then foil or a freezer safe bag. Freeze for up to 3 months. Thaw at room temperature overnight. If I plan to freeze rolls, I like to bake them in a disposable foil pan or pie plate.
- To make ahead of time: Prepare the rolls through step 5, then cover tightly and place in the fridge. (Skip the 2nd rise). About an hour before you’re ready to bake, remove the rolls from the fridge and allow them to rise at room temperature, then bake as usual.

What Goes with Garlic Dinner Rolls
These dinner rolls work beautifully alongside classic holiday dishes like Oven Roasted Turkey, Crock Pot Mashed Potatoes, and Baked Stove Top Stuffing.
They’re also perfect for any weeknight dinner. Serve them alongside a store-bought rotisserie chicken and Skillet Green Beans or Roasted Carrots and Parsnips. The garlic flavor also pairs well with Italian favorites like Crock Pot Ground Beef Spaghetti and Panko Chicken Piccata.
More Yeast Bread Recipes to Try
- Amish White Bread
- Overnight Butterhorn Rolls
- Cheesy Jalapeno Bread
- Orange Sweet Rolls
- Rosemary Olive Oil Focaccia
Join Our Community
Sign up for the NeighborFood email community to get recipes in your inbox ad free and access exclusive content from us! You can also follow us on Instagram and Pinterest. Made our recipe? Leave us a star rating or comment below!
Garlic Dinner Rolls
Ingredients
- 10 Tablespoons unsalted butter
- 6 cloves garlic (minced)
- 4-4 1/2 cups all purpose flour (spooned and leveled)
- 2 packets instant fast rise yeast (1 ½ Tablespoons)
- ¼ cup granulated sugar
- 1 ½ teaspoons salt
- 1 ¼ cup warm milk (whole or 2% (110ish degrees))
- 1 large egg (at room temperature)
For coating:
- 1 egg
- 1 Tablespoon milk
- Grated Parmesan cheese (optional)
- Minced parsley (optional)
Instructions
- Make the garlic butter. Melt the butter in a small saucepan over medium low heat, then add the garlic. Cook for about a minute or until the garlic is fragrant. Remove from heat, and pour ⅓ cup of the mixture into a separate measuring cup. You can cover the remaining butter in the pot and just let it hang out until later. Cool the 1/3 cup butter until warm, but not hot (somewhere between 105 and 115 degrees).
- While the butter cools, add 3 3/4 cups of flour, yeast, sugar, and salt to the bowl of a stand mixer and mix on the lowest setting until combined. Add the warm milk, ⅓ cup of the butter garlic mixture, and egg and beat on low speed until flour is just combined.
- Switch to the dough hook attachment and increase the speed to medium. Beat for 2 minutes. Scrape the sides of the bowl and the hook, then beat again on medium speed for about a minute. At this point, the dough should begin pulling away from the sides of the bowl. If the dough is still quite sticky, add flour, 1-2 tablespoons at a time, until it is tacky but no longer sticks to your fingers, beating well after each addition.
- Transfer the dough to a lightly greased bowl and loosely cover with saran wrap or a towel. Place in a warm-ish spot to rise for 30 minutes.
- Lightly punch the dough to release any air bubbles. Grease a 9 x 13 inch baking dish (or 2 8 inch square or 9 inch pie plates) with non-stick spray. Pinch pieces of dough off and form them into balls, about 2 inches around. If you have a kitchen scale, you can measure the dough balls to make sure they’re similar in size. Mine were about 2 ounces each. Tip: I like to fold/tuck the edges of the dough under itself to create a smooth top, then roll it between my palms for a few seconds to form the ball. Line the dough balls up in the prepared pan.
- Cover the pan with a towel or saran wrap and place back in a warm spot to rise for another 30 minutes.
- Preheat the oven to 375 degrees. Whisk together the egg and Tablespoon of milk, then brush it on the top of the rolls. Bake for 12-14 minutes, or until the rolls are glossy and golden brown on top.
- If needed, re-melt the butter in the sauce pan while the rolls are baking. Remove the rolls from the oven and brush/pour the garlic butter over top. Sprinkle with grated Parmesan and parsley, if desired. Serve immediately or cool and store.
Notes
- Use the “wrist test” if you don’t have a thermometer. Place a few drops of the warm milk or butter on your wrist. If it feels warm but comfortable, you’re in a good spot. If it feels hot, you need to let it cool a bit longer.
- Looking for a warm place to rise? I love a sunny window or putting my oven on the warm setting and placing the bowl on top of the stove, where some of the excess heat vents.
- Storage: Wrap tightly with plastic wrap and store at room temperature for up to 2 days.
- Reheating: Cover with foil and place in a 350 degree oven for about 8-10 minutes, or until warmed through.
- Freezing: Wrap the baked rolls tightly in a double layer of plastic wrap or plastic wrap then foil or a freezer safe bag. Freeze for up to 3 months. Thaw at room temperature overnight. If I plan to freeze rolls, I like to bake them in a disposable foil pan or pie plate.
- To make ahead of time: Prepare the rolls through step 5, then cover tightly and place in the fridge. (Skip the 2nd rise). About an hour before you’re ready to bake, remove the rolls from the fridge and allow them to rise at room temperature, then bake as usual.
Equipment
Nutrition
Did you make this recipe?
Leave a review, Mention @NeighborFoodie, or tag #neighborfoodies!

Leave a Reply