

These Cheddar Chive Scones are rich, flaky, and melt-in-your-mouth tender, with sharp cheddar and fresh chives throughout. I bake these when I’m in the mood to switch things up from the usual sweet scone situation. They’re excellent alongside a full brunch menu , but can also stand alone as a savory breakfast treat.

Table of Contents
Super Flaky Cheddar Chive Scones Recipe
I’ve said it before and I’ll say it again: I love brunch. And even though I would never turn down a sweet blueberry scone, sometimes a savory scone really hits the spot! I started making these cheddar chive scones as an addition to my usual Sunday brunch spread, and I haven’t looked back since.
Scones get a bad wrap for being dry or flavorless, but I promise those are the last adjectives you’d use to describe these beauties. These scones are lofty, tender, and flaky. You’ll get layers of rich buttery flavor, a hint of tang thanks to the sour cream, plus the irresistible combination of cheddar cheese and sharp, springy chives.
These scones served alongside a slice of crustless quiche lorraine and a lemony arugula salad is pure heaven. The stuff my brunch dreams are made of. Save these for your Easter brunch menu or spoil yourself on a lazy Saturday morning. You’ll feel like you’re in the city’s best cafe!
CourtneyKey Ingredients + Substitutions
- All-purpose Flour– Regular AP flour works great here. Be sure to measure it correctly! I like to spoon it into the measuring cup until it is heaping, then level it off with the flat end of a butter knife.
- Granulated Sugar– I know it’s a savory scone, but you’re still going to want a little sugar for both structure and flavor.
- Kosher Salt– To add extra flavor to the dough!
- Baking Powder– Helps the cheese scones rise and stay fluffy. Make sure it’s fresh for the best results! We’re using 1 1/2 Tablespoons (NOT teaspoons) for the fluffiest bite.
- Egg– Adds structure and a bit of richness.
- Heavy Cream– Keeps the scones tender and rich. You’ll also use a little for brushing the tops, which helps with browning! You can substitute half and half in a pinch.
- Sour Cream– Adds moisture and a subtle tang. Plain Greek yogurt works as a substitute.
- Cold Unsalted Butter– The key to flaky layers. Keep it very cold for best results.
- Sharp Cheddar Cheese– I love the flavor that sharp cheddar cheese lends in these cheddar chive scones. But you can swap for white cheddar, Gruyère, or even pepper jack for a twist!
- Fresh Chives– Add a mild onion flavor. Green onions can work in a pinch!
How to Make Cheddar Chive Scones
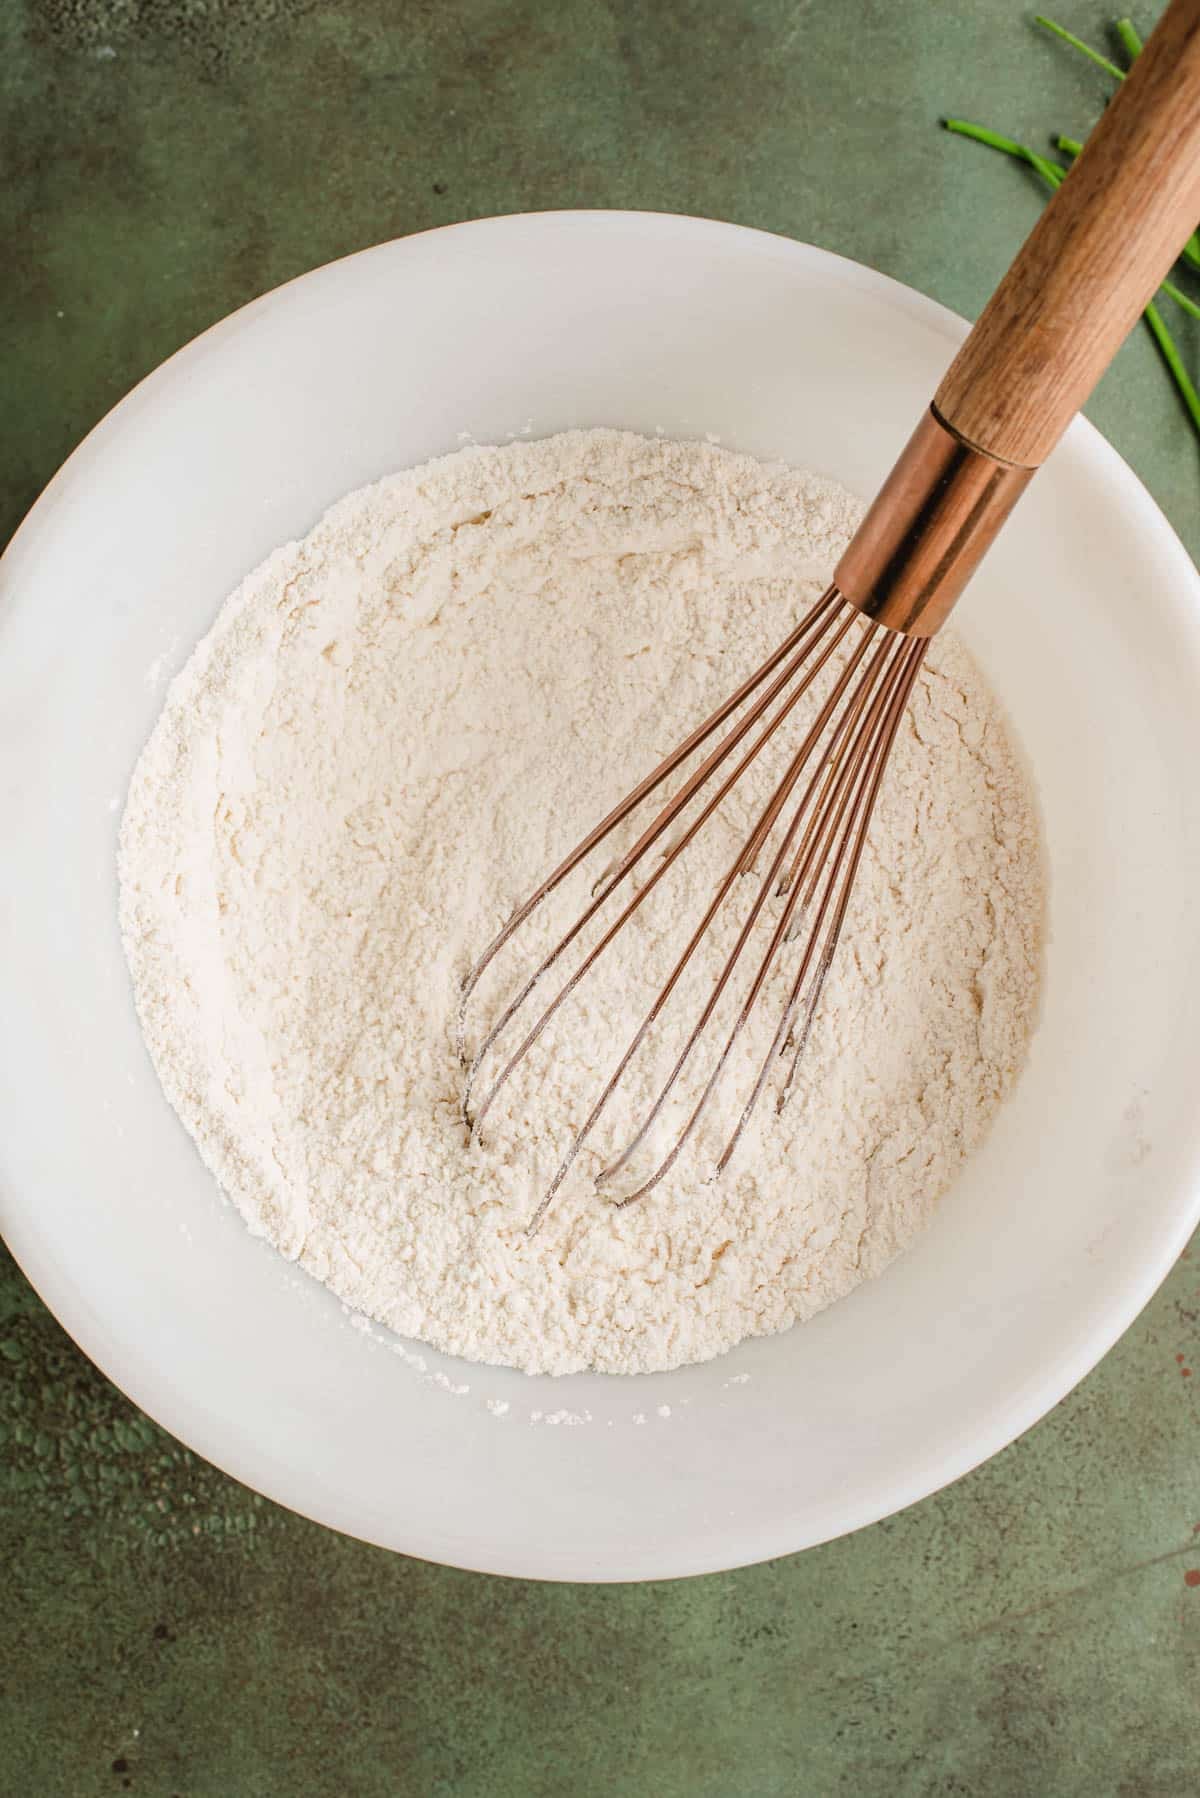
Step 1: In a large bowl, whisk together the flour, sugar, salt, and baking powder.
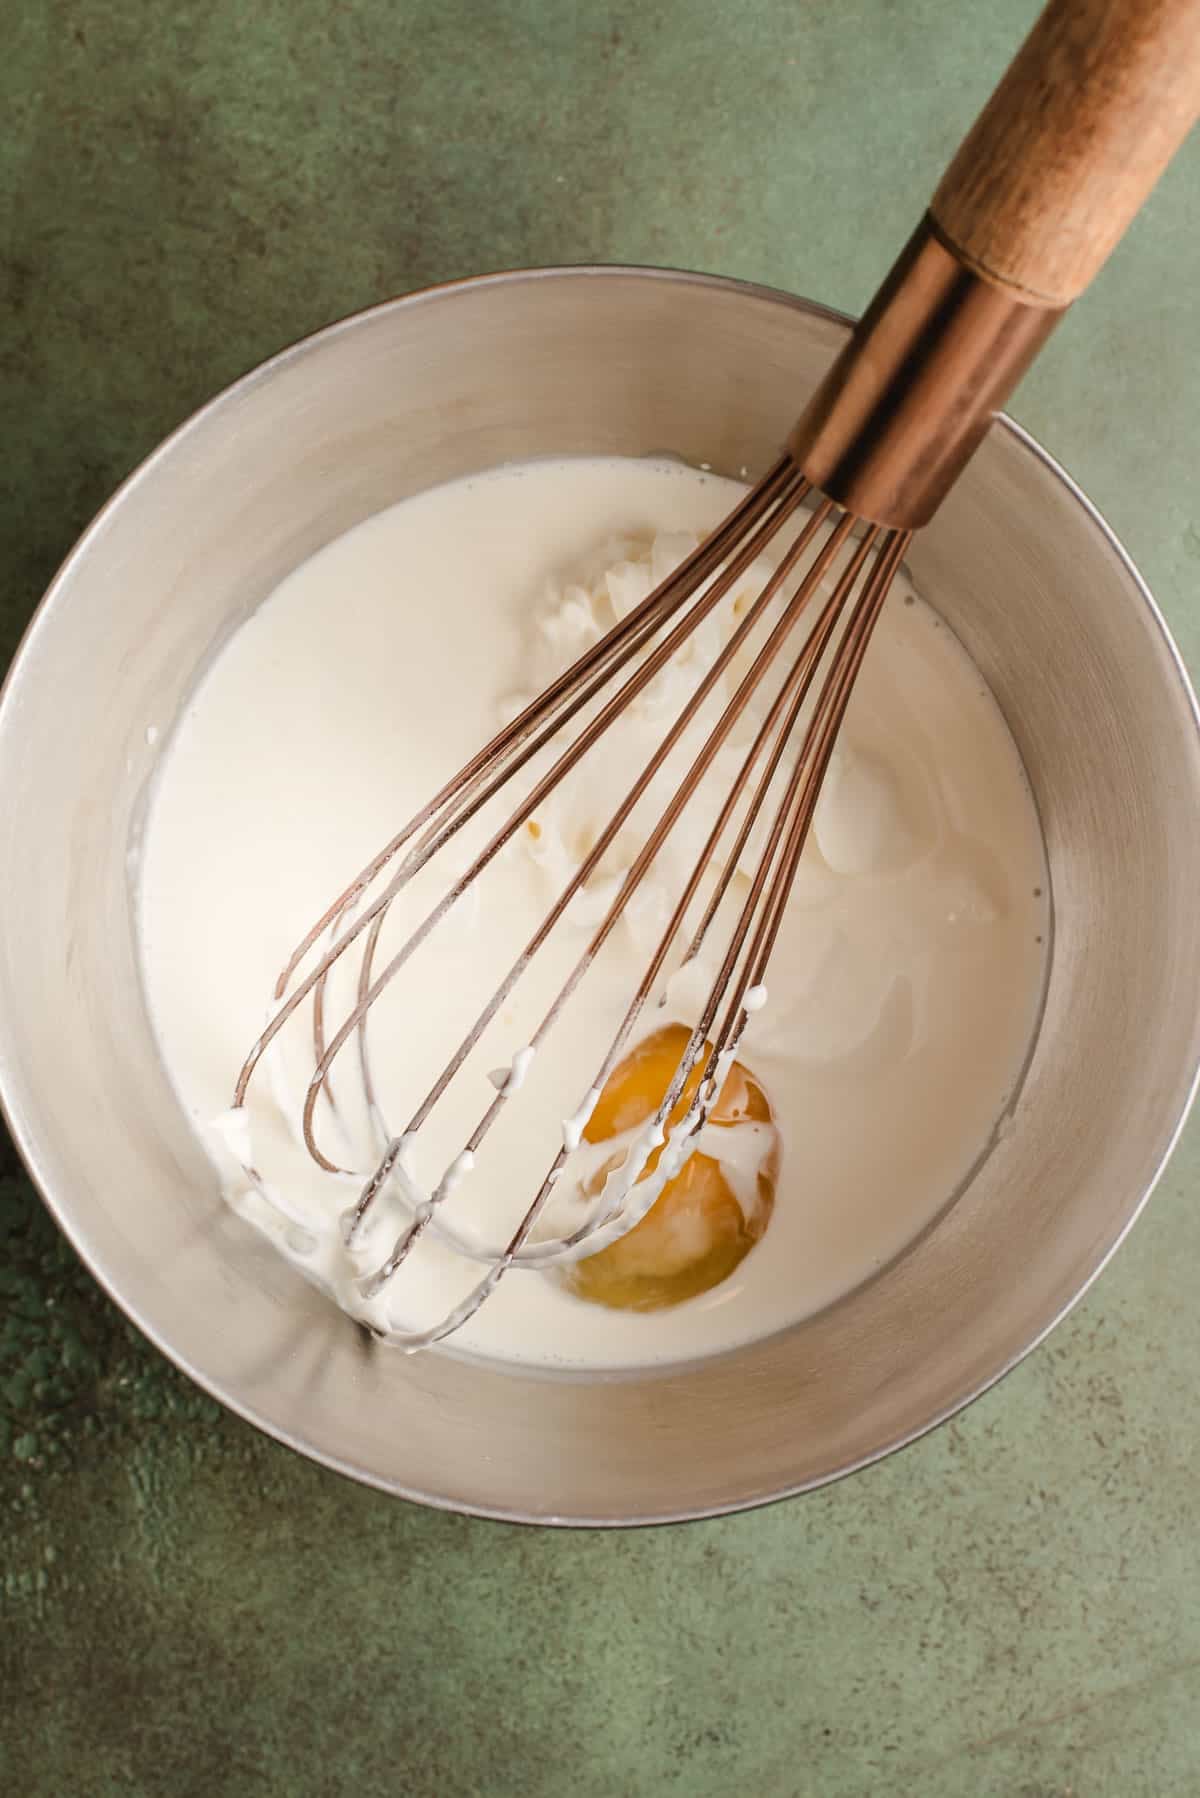
Step 2: In a smaller bowl, whisk together the egg, heavy cream, and sour cream.
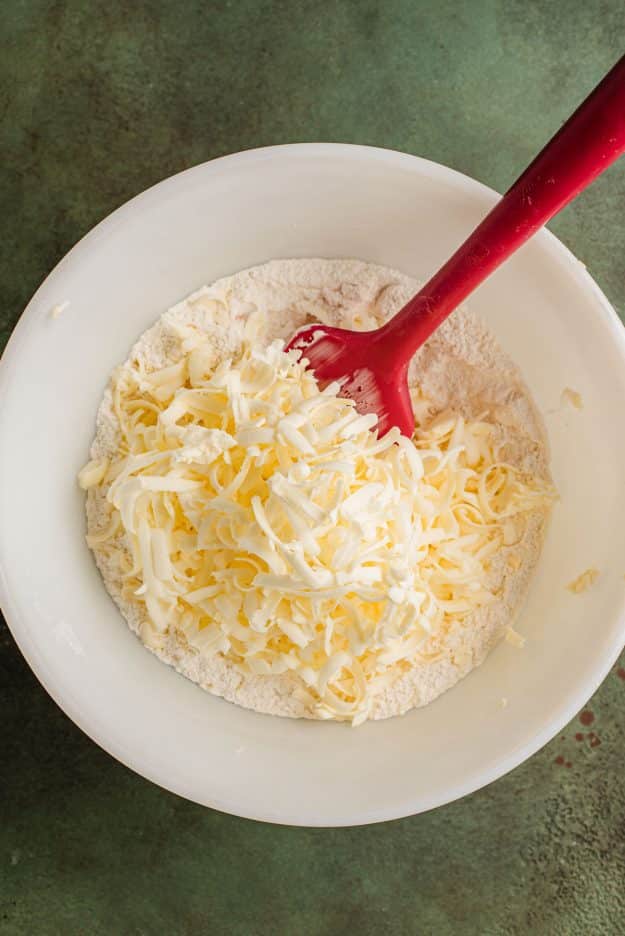
Step 3: Now, go back to the dry mixture to work in the butter. You can do this by cubing the butter and then using a pastry cutter to work it into small, pea size bits. I prefer to use a coarse grater to grate the butter into the flour and then stir together.
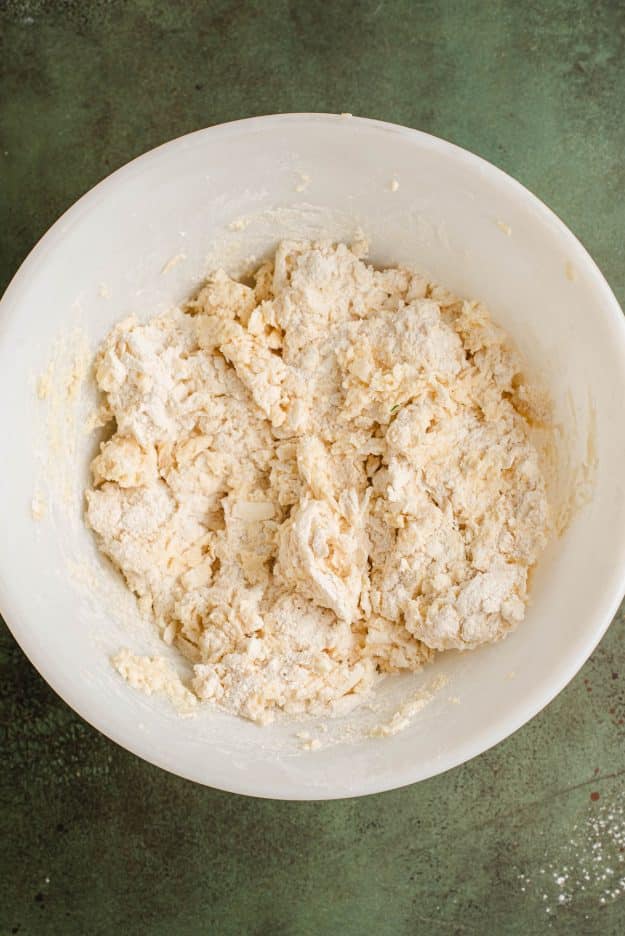
Step 4: Pour the cream mixture into the dough, and use a spatula to gently fold together until a shaggy dough begins to form.
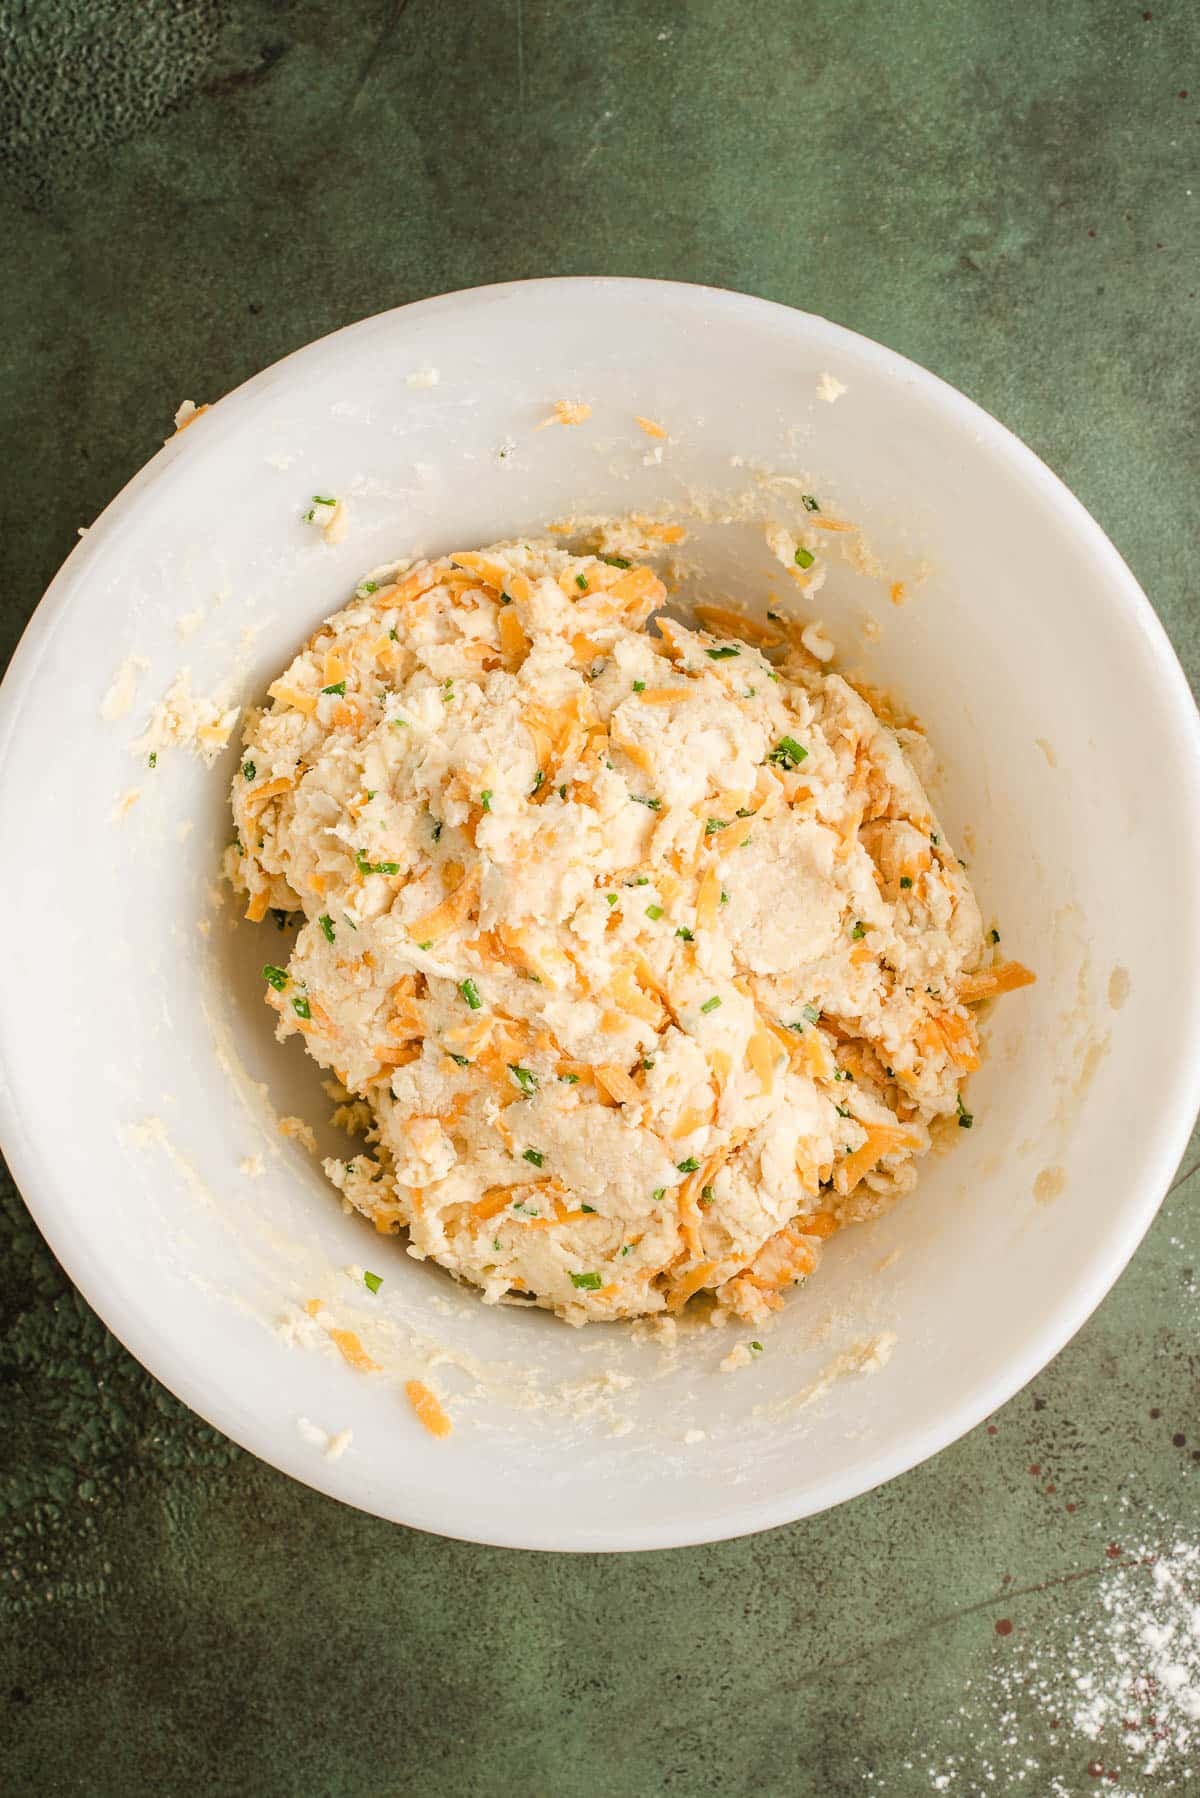
Step 5: Stir in the cheddar cheese and chives, then use your hands to scoop under the dough, folding it on top of itself to create layers. Do this 5-7 times, or until the cheese is distributed and no flour streaks remain. If the dough seems dry, dribble in some ice cold water until it comes together.

Step 6: Lightly flour a work surface, then turn the dough out on top of it. Form the dough into a circle, about 8 inches in diameter and 1.5-2 inches tall. Use a pizza slicer to cut through the middle, then slice each half into 3 equal pieces.

Step 7: Transfer the scones to a parchment paper or silicone lined baking sheet. Place in the freezer for at least 30 minutes or the fridge for an hour (DON’T SKIP THIS PART!).

Step 8: Preheat the oven to 400 degrees. Remove the scones from the freezer and brush the tops with cream. Bake for 10 minutes, then reduce the heat to 375 degrees and continue to bake another 9-12 minutes, or until the scones are golden brown on the bottom and no longer look wet on top. Allow to rest on the pan for 10-15 minutes. Transfer to a wire rack to cool completely.
Recipe Tips & Variations
- Keep everything cold! Cold butter is what creates those flaky, tender layers. If your kitchen is warm, or the dough starts to feel soft at any point, don’t hesitate to pop the bowl in the fridge and chill it briefly before continuing.
- Don’t overwork the dough. The more you handle it, the tougher your scones will be. You want to mix just until everything comes together, then do a few folds to build layers. It’s okay if the dough looks a little shaggy, that’s actually what you want!
- Freeze before baking. Again, we want cold dough to go into the oven so we get flaky layers instead of a tray of melted butter. Don’t skip this part!
- Add bacon for extra flavor! Crumbled, cooked bacon takes these cheddar scones over the top. I like to use my oven-baked bacon recipe to prep bacon easily. If you go this route, reduce the salt slightly so things don’t get too salty!
- Cut in squares, not wedges for smaller scones. Form the dough into an 8-9 inch square. Slice into 9 squares, and reduce the baking time by 1-2 minutes. These smaller servings work great for sandwiches or if you’re serving the scones alongside several other dishes.
FAQs
Chilling solidifies the butter, which helps create those flaky layers when the scones hit the oven. It also helps the scones hold their shape and prevents them from spreading too much.
They should be golden brown on the bottom and set on top, without any wet or doughy spots. If you’re unsure, you can gently lift one to check the underside. It should be nicely browned.
You can easily switch up the flavor by using cheeses like Gruyère, Fontina, Monterey Jack, or even pepper jack for a little heat. Fresh herbs like parsley, dill, thyme, or green onions also work well in place of chives, depending on the flavor you’re going for.
Storage and Make-Ahead Instructions
- Storing: Keep leftover scones in an airtight container at room temperature for up to 2 days, or refrigerate for up to 4 days.
- Reheating: To recapture that fresh from the oven texture, reheat scones in an air fryer at 390 degrees for about 3-4 minutes.
- Freezing (baked): Let them cool completely, then freeze in a sealed container for up to 2 months. Thaw overnight then reheat (preferably in the air fryer) before serving.
- Freezing (unbaked): Freeze the cut scones on a baking sheet, then transfer to a freezer bag. Bake straight from frozen, adding a couple extra minutes to the bake time.
- Make ahead: Prepare the savory scone dough and cut the scones the night before, then refrigerate overnight and bake fresh in the morning.

What to Serve with Cheddar Chive Scones
These cheddar and chive scones are absolutely delicious with other brunch options like Overnight Breakfast Casserole with Bacon or Ham and Cheese Frittata. They’re also great split and used as a base for breakfast sandwiches! Use them to make a classic Scrambled Egg Sandwich.
And of course, they’re just as satisfying all on their own with a little butter while they’re still warm.
More Savory Breakfast Recipes to Try
Join Our Community
Sign up for the NeighborFood email community to get recipes in your inbox ad free and access exclusive content from us! You can also follow us on Instagram and Pinterest. Made our recipe? Leave us a star rating or comment below!
Join Our Community
Sign up for the NeighborFood email community to get recipes in your inbox ad free and access exclusive content from us! You can also follow us on Instagram and Pinterest. Made our recipe? Leave us a star rating or comment below!

Cheddar and Chive Scones Recipe
Ingredients
- 2 ½ cups all purpose flour (spooned and leveled)
- 3 Tablespoons granulated sugar
- 3/4 teaspoon Kosher salt
- 1 ½ Tablespoons baking powder
- 1 large egg
- ⅓ cup heavy cream (plus more, for brushing)
- ⅓ cup sour cream
- ½ cup cold butter (1 stick)
- 1 ¼ cup shredded sharp cheddar cheese
- 3 Tablespoons chopped chives
Instructions
- In a large bowl, whisk together the flour, sugar, salt, and baking powder.2 ½ cups all purpose flour, 3 Tablespoons granulated sugar, 3/4 teaspoon Kosher salt, 1 ½ Tablespoons baking powder
- In a smaller bowl, whisk together the egg, heavy cream, and sour cream.1 large egg, ⅓ cup heavy cream, ⅓ cup sour cream
- Now, go back to the dry ingredients to work in the butter. You can do this by cubing the butter and then using a pastry cutter to work it into small, pea size bits. I prefer to use a coarse grater to grate the butter into the flour and then stir together.½ cup cold butter
- Pour the cream mixture into the dough, and use a spatula to gently fold together until a shaggy dough begins to form. Stir in the cheddar cheese and chives, then use your hands to scoop under the dough, folding it on top of itself to create layers. Do this 5-7 times, or until the cheese is distributed and no flour streaks remain. If the dough seems dry, dribble in some ice cold water until it comes together.1 ¼ cup shredded sharp cheddar cheese, 3 Tablespoons chopped chives
- Lightly flour a work surface, then turn the dough out on top of it. Form the dough into a circle, about 8 inches in diameter and 1.5-2 inches tall. Use a pizza slicer (preferred method) or sharp knife to cut through the middle of the circle, then slice each half into 3 equal pieces.
- Transfer the scones to a parchment or silicone lined baking sheet. Place in the freezer for at least 30 minutes or the fridge for an hour (DON’T SKIP THIS PART!).
- Preheat the oven to 400 degrees. Remove the scones from the freezer and brush the tops with cream. Bake for 10 minutes, then reduce the heat to 375 degrees and continue to bake another 9-12 minutes, or until the scones are golden brown on the bottom and no longer look wet on top. Allow to rest on the pan for 10-15 minutes. Transfer to a wire rack to cool completely.
Notes
- Alternative baking instructions for squares (perfect for sandwiches): Form the dough into an 8-9 inch square. Slice into 9 squares. Reduce the baking time by 1-2 minutes.
- You don’t need me to tell you these would be FABULOUS with some crumbled oven roasted bacon. Reduce the salt to ½ teaspoon if you make this addition.
Nutrition
Did you make this recipe?
Leave a review, Mention @NeighborFoodie, or tag #neighborfoodies!


Leave a Reply