The BEST Homemade Pie Crust + Buttermilk Pie Crust Recipe
May contain affiliate links. See our disclosure policy.
If you’ve ever felt like Homemade Pie Crust was just too difficult, this post is for you! I’m walking you through the process of making my favorite Buttermilk Pie Crust from scratch! I’ve included photos of every step, so you can make pie crust from scratch like a BOSS.

A few years ago, I tested three different homemade pie crust recipes: one all butter, one all-shortening, and one vegetable oil crust. They each had their merits, but the butter pie crust beat the pants off the other two in flavor.
The only problem? The butter crust was also the most difficult to work with. It was more time consuming and often stuck to the counter/parchment paper/my fingers.
I thought I was destined to ride the pie crust struggle bus for life, then two things changed.
- I stumbled on Joy the Baker’s Best All Butter Pie Crust (that had buttermilk of all things!) Joy has been a baking hero of mine for a long time now, and when she says a crust is the best, I’m going to believe her.
- I finally caved and bought myself a food processor.
Suddenly, what once felt like a daunting all-day task–where I would inevitably make a huge mess and possibly cry a little–became a totally, doable, satisfying, and dare-I-say fun kitchen adventure!
Today, I’m here to give you this same gift: Homemade Pie Crust that is easy, stress free, flaky, and SO delicious. This Buttermilk Pie Crust is so good, it tends to steal the show.
Essential Pie Crust Baking Tools
Let’s get started by breaking down what you’ll need:
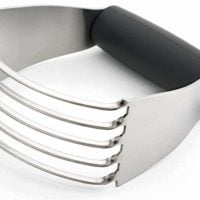
- Food processor (<this is mine, and I love it!) or pastry cutter
- I made pie crust without a food processor for a long time, and I’ll be honest, I hated it. Maybe I just have tiny baby muscles, but I really hate working flour and butter with a pastry cutter. That said, it’s absolutely doable–just a bit more time consuming (heck, count it as your workout for the day!)
- Rolling pin
- Wax paper, parchment paper, or a silicone mat for rolling out the dough. I love using this silicone pastry mat, because it makes it easy to measure and ensure my rolled pie crust is large enough.
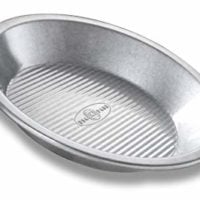
- 9 inch pie tin– I like these basic aluminum ones.

Buttermilk Pie Crust Ingredients
The ingredients for this pie crust are pretty simple! What sets this recipe apart is the addition of buttermilk. It makes the crust SO flavorful and rich, and also makes it a bit easier to work with than your typical all butter pie crust. Here’s what you’ll need:
- 2 1/2 cups all purpose flour– measured using the spoon and level method
- 2 Tablespoons granulated sugar– you can omit this if you’re making a savory pie
- 1 teaspoon salt
- 1 cup (2 sticks) unsalted butter, COLD-like, really really cold
- 1/2 cup cold buttermilk, plus a few Tablespoons extra, if needed
How to Make Homemade Pie Crust
Alright, let’s get this recipe rolling (<<har har)!
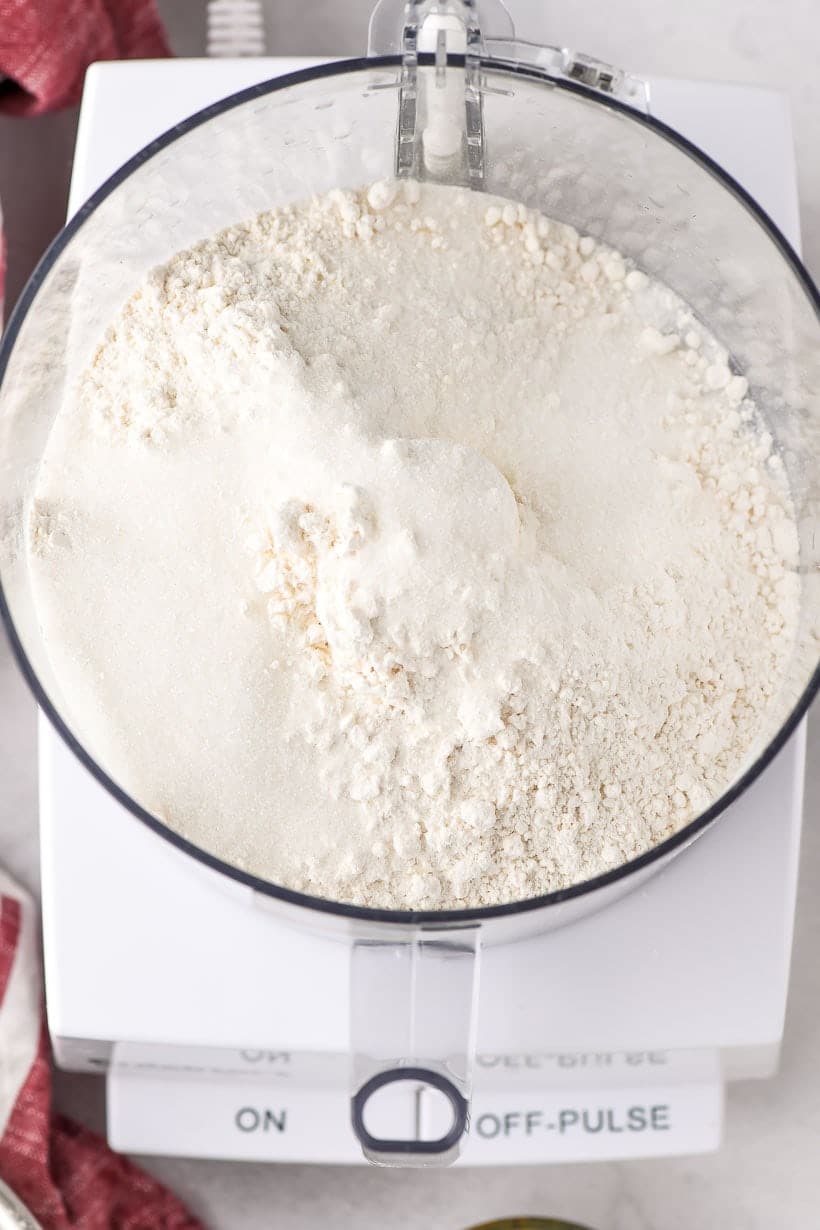
- Place the flour, salt, and sugar in a food processor and give it a few pulses to get everything mixed together.

- Add the butter and pulse again, just until the butter is broken up into small bits. The general guideline is pea-sized bits of butter, but it’s okay if some of them are still a little bigger than that.

- Pour in the buttermilk and pulse a couple times. Open the lid, and give it a look. I know what you’re thinking. This does NOT look like pie crust. You have led me astray! All is lost! But trust me on this one, all is not lost. You’re doing great!
- Pick up a bit of the mixture and pinch it between your thumb and finger. If it sticks together, YOU’VE GOT IT! If it doesn’t add another Tablespoon of buttermilk until it does. Pie dough is weird and can behave differently depending on the day and the weather (literally!). Sometimes I don’t need to add any extra buttermilk, and sometimes I need another 2 Tablespoons.
- Dump your pie dough out onto a lightly floured countertop or nifty silicone baking mat. Again, this will not look like pie dough. It will look more like a failed sand castle. THIS IS A GOOD THING. DO NOT PANIC.
- Use your hands to begin smooshing the dough together from all sides, then turning it over and continuing to smoosh (a very technical term, I know) until the dough comes together in a rough, shaggy ball. Work quickly to avoid warming up the butter. Don’t worry about getting everything smoothed out. It won’t be perfect and that’s fine!

- Divide the dough in half. A kitchen scale can be really handy here to make sure you actually get two even balls of dough. There’s nothing worse than realizing you don’t have enough crust for your pan!
- Wrap the balls in plastic wrap and smoosh (there’s that word again) them into a thick disk with the palm of your hand. Refrigerate for at least one hour or overnight.
- To roll out, lightly flour a countertop or silicone baking mat, or two pieces of wax paper. Place the cold dough disk in the center, and use a rolling pin to roll the dough out to a roughly 12 inch circle for a standard 9 inch pie. It helps to rotate the dough every few rolls to get it evenly rolled out AND ensure it’s not sticking on the bottom. See tips below if you run into trouble at this step.
- Transfer the dough to the pie plate using the rolling pin method, or, if you’re using wax paper, you can usually flip the bare side of dough into the pan then gently peel off the wax paper.
- Even up the edges by removing any excess dough and pressing it into other areas that might be sparse with your fingers.
- Shape or crimp the dough using your favorite method (I love these fun and easy pie crimping methods!). Chill the dough for at least another 15 minutes before baking.


What to Make with Your Amazing Buttermilk Pie Crust
My all time favorite pie is this Bumbleberry Pie. It’s the ultimate summer pie and perfect for the Fourth of July! I also love this Peach Pie Crumble for the summer months.
For the holidays, I love this Coconut Custard Pie and Chocolate Banana Cream Pie.
And year round you can’t beat a Peanut Butter Meringue Pie or Mom’s Classic Custard Pie.
Common Questions + Troubleshooting Homemade Pie Crust
The best advice I can give to make your pie crust endeavors a breeze is to keep all of your ingredients COLD.
- After I cube my butter, I often pop it in the freezer for 15 minutes just to get it extra cold, and give myself a little buffer.
- This also means you’ll want to work quickly (and not stop to take a zillion photos…ahem). Just a few pulses of the food processor is usually all you need at each step.
- When you’re bringing the dough together with your hands, work quickly and don’t worry about imperfections.
- When in doubt, CHILL THE DOUGH. If it’s getting difficult to deal with (overly sticky), toss it back in the fridge for a few minutes. If it’s sticking to the wax paper after you’ve transferred it to the pan, chill the dough again. A quick chill will usually allow the wax paper to peel right off!
Why is my pie dough so crumbly and falling apart? Why did my pie crust crack?
This is most likely a sign that your dough is too dry. If your crust cracks while you’re rolling it out, gently work in a few more drops of buttermilk. If it gets too soft from reworking, you guessed it, CHILL THE DOUGH before trying to roll out again.
Why is my pie dough so sticky?
Stickiness is a sign that your dough is either too wet, too warm, or a combination of both. Make sure you’ve got a light dusting of flour underneath your pie dough, on top of the dough, and on your rolling pin. Use wax paper if it continues to stick, and when in doubt, chill the dough.
My homemade pie crust has holes in it!
If your crust gets holes or is uneven in the pan, use the scraps you took off the edges to gently press in and repair the dough. You can also use extras from the second pie crust, but know that you might not be able to use that crust for another pie. That’s okay, you can always use scraps for pie crust cookies!
Can you freeze homemade pie crust?
Yes! To freeze homemade pie dough, place the saran wrapped dough disk in another layer of wrap or freezer safe bag. Label it with the date, and freeze for up to 3 months. Thaw in the fridge overnight then roll out and bake as usual.
How long does homemade pie dough last in the fridge?
You can make the pie crust up to 3 days in advance and store it in the fridge, which is great for busy holiday meals!


Buttermilk Pie Crust Recipe
Ingredients
- 2 1/2 cups all purpose flour
- 2 Tablespoons granulated sugar
- 1 teaspoon salt
- 1 cup COLD unsalted butter (2 sticks )
- 1/2 cup cold buttermilk (plus a few Tablespoons more if needed)
Instructions
- Place the flour, sugar, and salt in a food processor and pulse until combined.
- Cut each stick of butter into about 10 chunks and add them to the food processor. Pulse until the butter is broken up and the mixture resembles coarse sand.
- Scrape the bowl if needed, then pour the buttermilk over top of the flour mixture. Pulse again until the buttermilk is evenly distributed and a shaggy, crumbly dough begins to form. Alternatively, you can do this by hand, using a pastry cutter to work the butter into the dough, then making a well in the center, adding the buttermilk, and using a fork to moisten all the flour bits.
- Turn the dough out onto a clean, lightly floured countertop. It's okay if it's still crumbly at this point. Divide the dough in half then gently use your hands to knead each half into a ball. If the dough remains dry and crumbly, add just a teaspoon or two more of buttermilk at a time until it comes together. Gently press down each ball into a disk. Wrap in saran wrap and chill for at least 1 hour or up to 3 days.
- To roll, lightly sprinkle a countertop, silicone baking mat, or piece of parchment paper with flour. Place the chilled dough disk in the center and sprinkle with flour or top with a second layer of parchment.
- Use a rolling pin to press the dough out, starting at the 12 o'clock position and moving to the 3 position. Rotate the dough clockwise and repeat until the dough is rolled into about a 12 inch round circle. Either wrap the dough around a rolling pin to transfer to the pie tin or peel off one layer of parchment, flip it into the pie tin, then peel off the second layer of parchment.
- Cut off any excess around the edges and patch any bare spots. Crimp as you like then chill for 15 minutes before blind baking or filling and baking as directed.
Notes
- After I cube my butter, I often pop it in the freezer for 15 minutes just to get it extra cold, and give myself a little buffer.
- This also means you’ll want to work quickly (and not stop to take a zillion photos…ahem). Just a few pulses of the food processor is usually all you need at each step.
- When you’re bringing the dough together with your hands, work quickly and don’t worry about imperfections.
- When in doubt, CHILL THE DOUGH. If it’s getting difficult to deal with (overly sticky), toss it back in the fridge for a few minutes. If it’s sticking to the wax paper after you’ve transferred it to the pan, chill the dough again. A quick chill will usually allow the wax paper to peel right off!


Great tasting crust, but nowhere is there baking instructions (time and temp).
I have scoured the internet for a good pie crust for years, and this is the best one yet! My go-to now, thanks a bunch!
Wow! So glad to hear this! Thanks for coming back to let me know!
Omg I made it the first time ever making pie dough I can’t wait til tomorrow to taste it
I found your crust recipe this past autumn when I decided to try baking my own. I used it to bake several apple and even a few pumpkin pies. The result was always great–whether I used the pie crust right away or froze it for use later. Thank you so much for sharing it! Today I was preparing to use the recipe for a strawberry pie to serve my family tomorrow for Resurrection Sunday. The recipe I am using calls for a baked pie shell. I realized your recipe does not include instructions to use for an unbaked pie. After a little research on your site, I did find that your Coconut Pecan Turtle Cream Cheese Pie calls for an unbaked pie shell and you gave instructions there unlike the Chocolate Banana Cream Pie that I looked at first. I thought perhaps you would like to update this with instructions or a link to the pie that gives instructions. I truly am thankful I did find your instructions for this particular crust as I didn’t want to ruin it!