
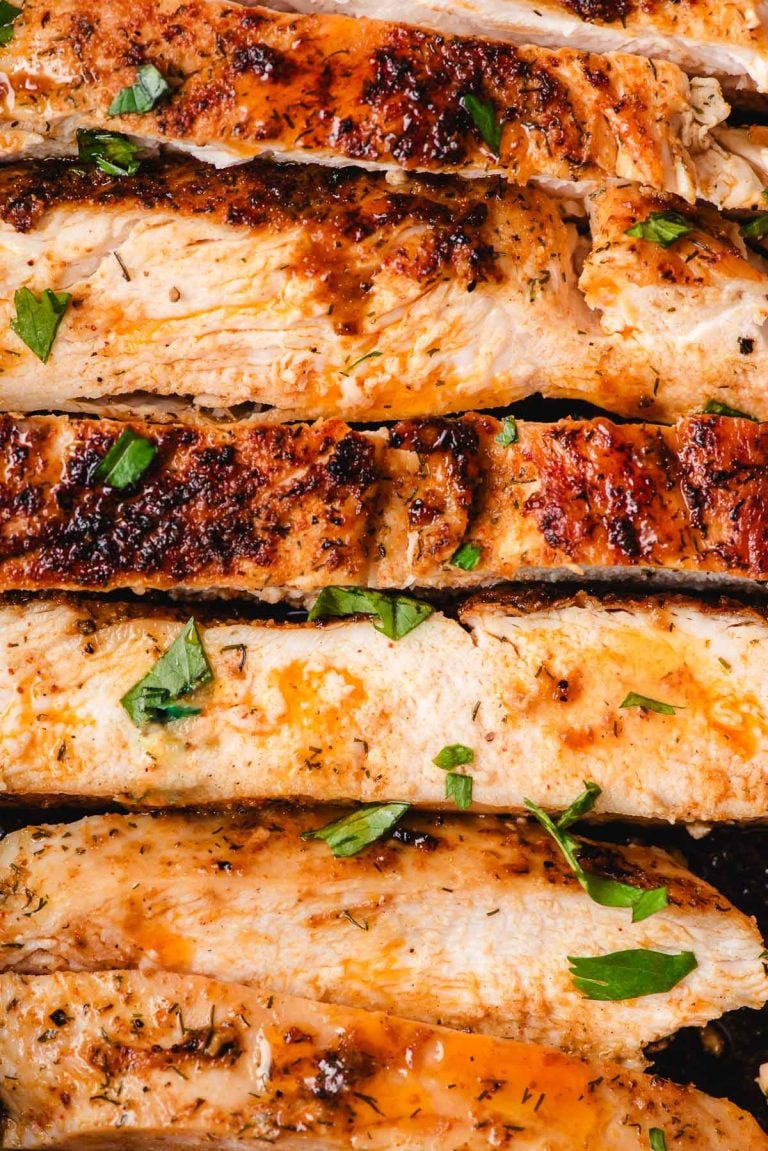
These breaded, crispy chicken cutlets are thinly pounded chicken breasts coated in seasoned panko breadcrumbs and pan-fried until deeply golden and crisp. They’re cooked quickly in a hot skillet, where the exterior turns crackly and browned while the inside stays juicy and tender, with no soggy breading in sight! This breaded chicken cutlets recipe is easy enough for a weeknight but impressive enough for company. We like to serve them with mashed potatoes when we’re craving comfort food, or with our crispy chicken salad for a restaurant worthy lunch or dinner.
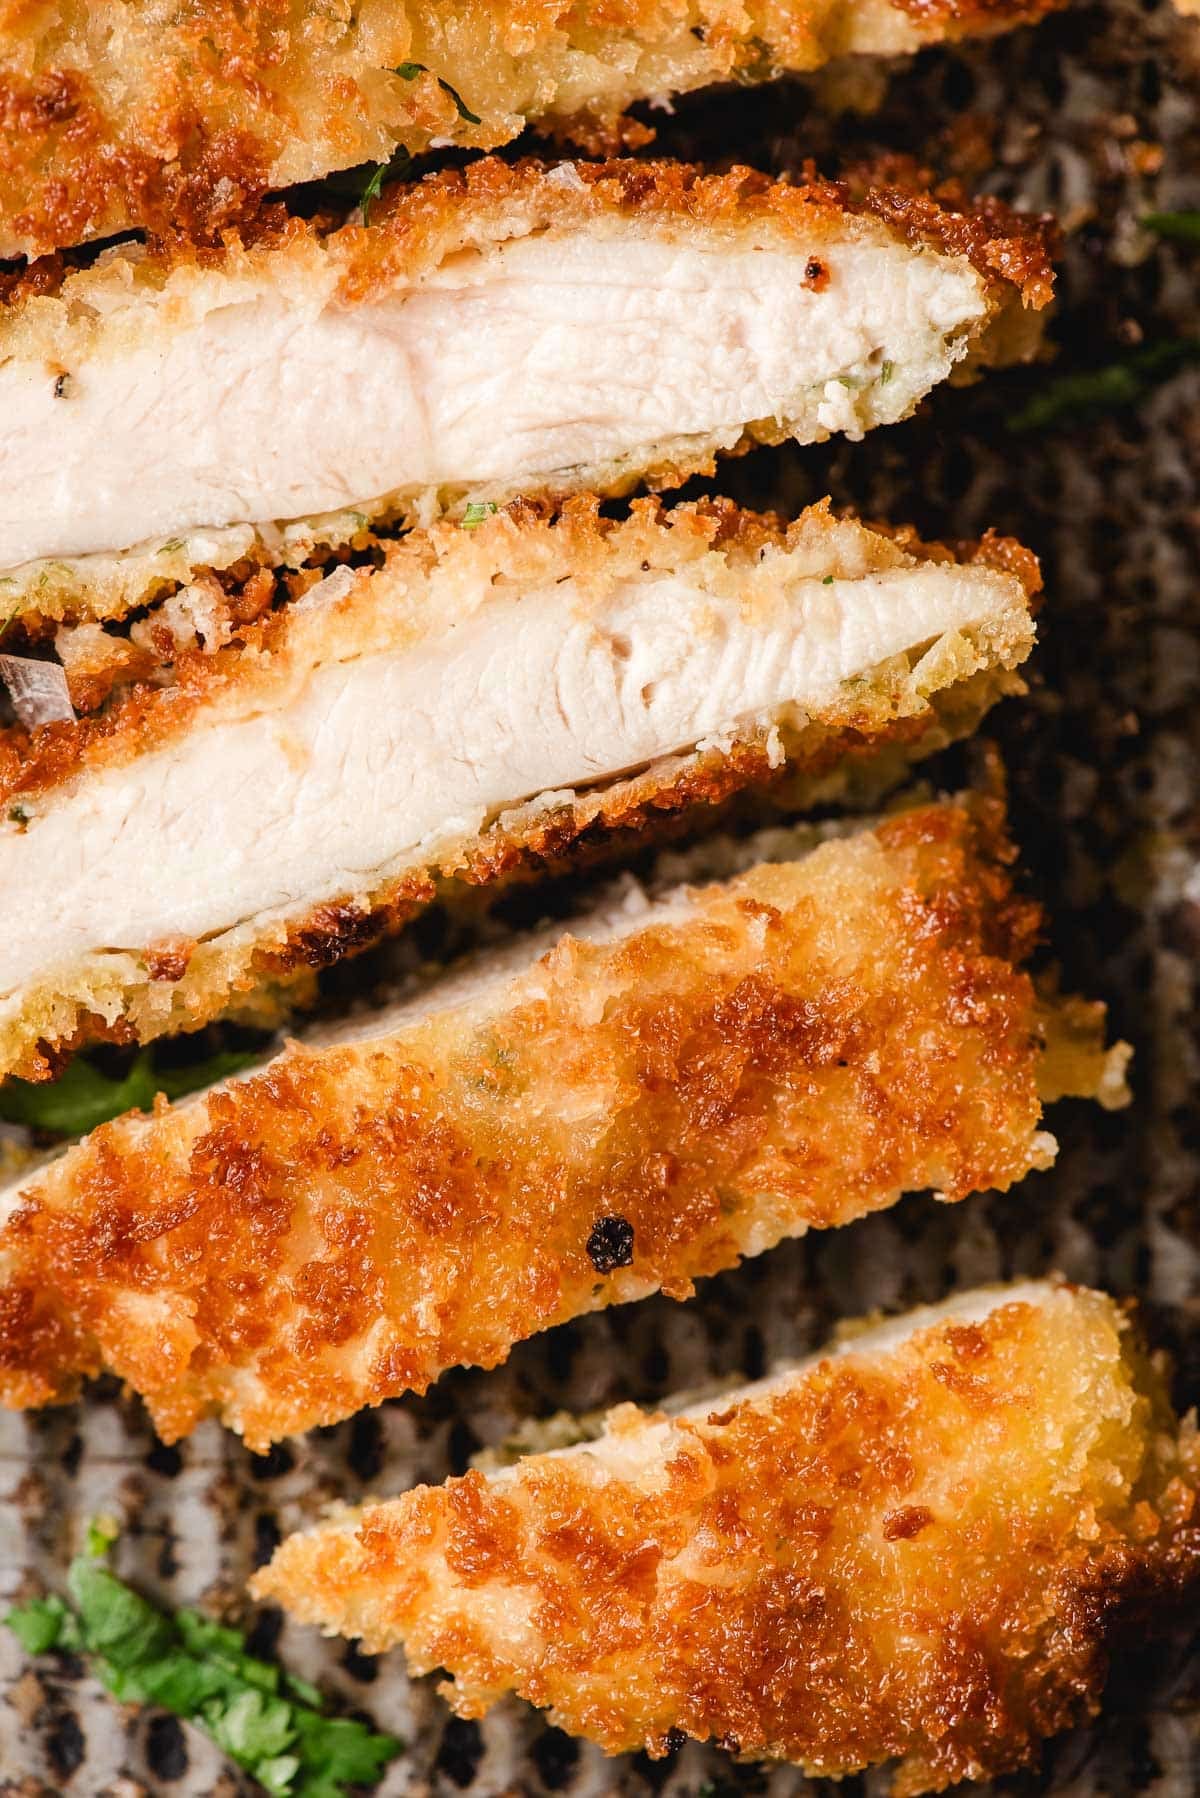
Table of Contents
Why You’ll Love these Crispy Breaded Chicken Cutlets
If you’ve tried my oven fried chicken breasts, you know I don’t mess around when it comes to a crunchy coating! These pan fried chicken cutlets cook even faster and develop an ultra-crisp crust thanks to a quick shallow fry in a cast iron skillet, which delivers steady, even heat and that perfect golden finish.
Unlike recipes that rely solely on olive oil (often leading to dark spots or burnt crumbs) this balanced oil blend keeps the crust evenly golden and crisp from edge to edge. The kids love dipping their cutlets in honey mustard or ketchup, and we love serving them in chicken bacon wraps, chicken sandwiches, or on top of an easy garden salad for a quick, well balanced meal.
I hope you’ll love this versatile and quick weeknight chicken dinner!
CourtneyWhat Makes These Cutlets Extra Crispy
Three small details make a big impact!
- Thin, even pounding: Aim for about ¼ inch thick. Thin cutlets mean more crispy surface area and fast, even cooking without drying out.
- The oil blend: A mix of olive oil and vegetable oil prevents burning while still delivering flavor.
- Rack resting method: Resting on a cooling rack (not paper towels) and keeping them in a warm oven keeps air circulating so the coating stays crunchy.
After a lot of testing, these three steps consistently gave me the best golden brown chicken with a crunchy coating and juicy inside.
Ingredients You’ll Need

- Boneless skinless chicken breasts: Thin-sliced chicken breasts or whole breasts sliced and pounded thin for even cooking. You can also use this method with chicken tenderloins.
- Kosher salt: Draws out flavor and keeps the chicken seasoned throughout.
- Dried parsley: Adds subtle herb flavor.
- Garlic powder: Brings savory depth.
- Black pepper: Just enough warmth.
- Olive oil + vegetable oil: The combination keeps the oil from burning. You can substitute avocado oil if preferred.
- All purpose flour: The first layer in your dredging station. It helps the egg adhere.
- Eggs: The glue that holds everything together.
- Panko bread crumbs: The secret to light, crispy breaded chicken cutlets.
- Flaky sea salt & fresh herbs: Optional finishing touch.
How to Make Crispy Chicken Cutlets
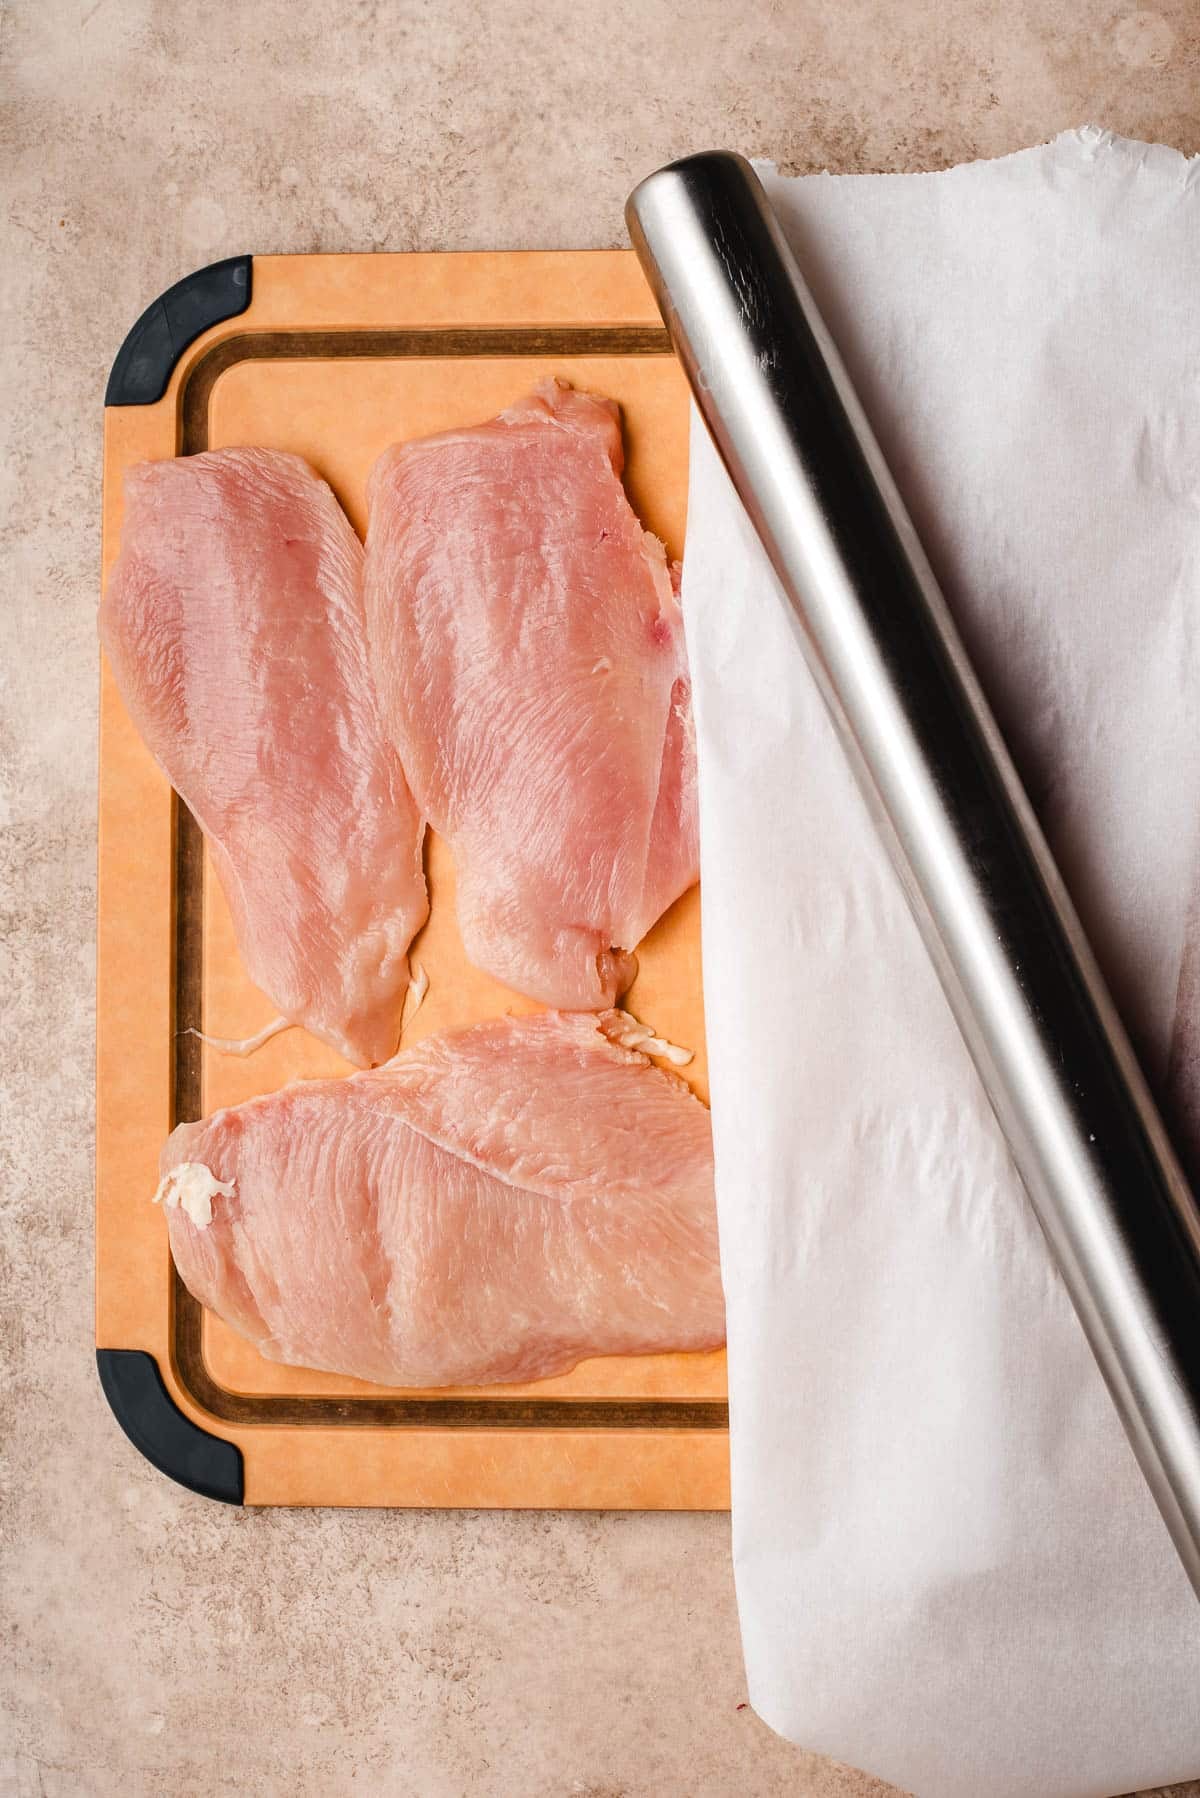
Step 1: Slice each chicken breast lengthwise so it’s half as thick. Cover with parchment and pound with a meat mallet or heavy rolling pin to about ¼ inch thick.
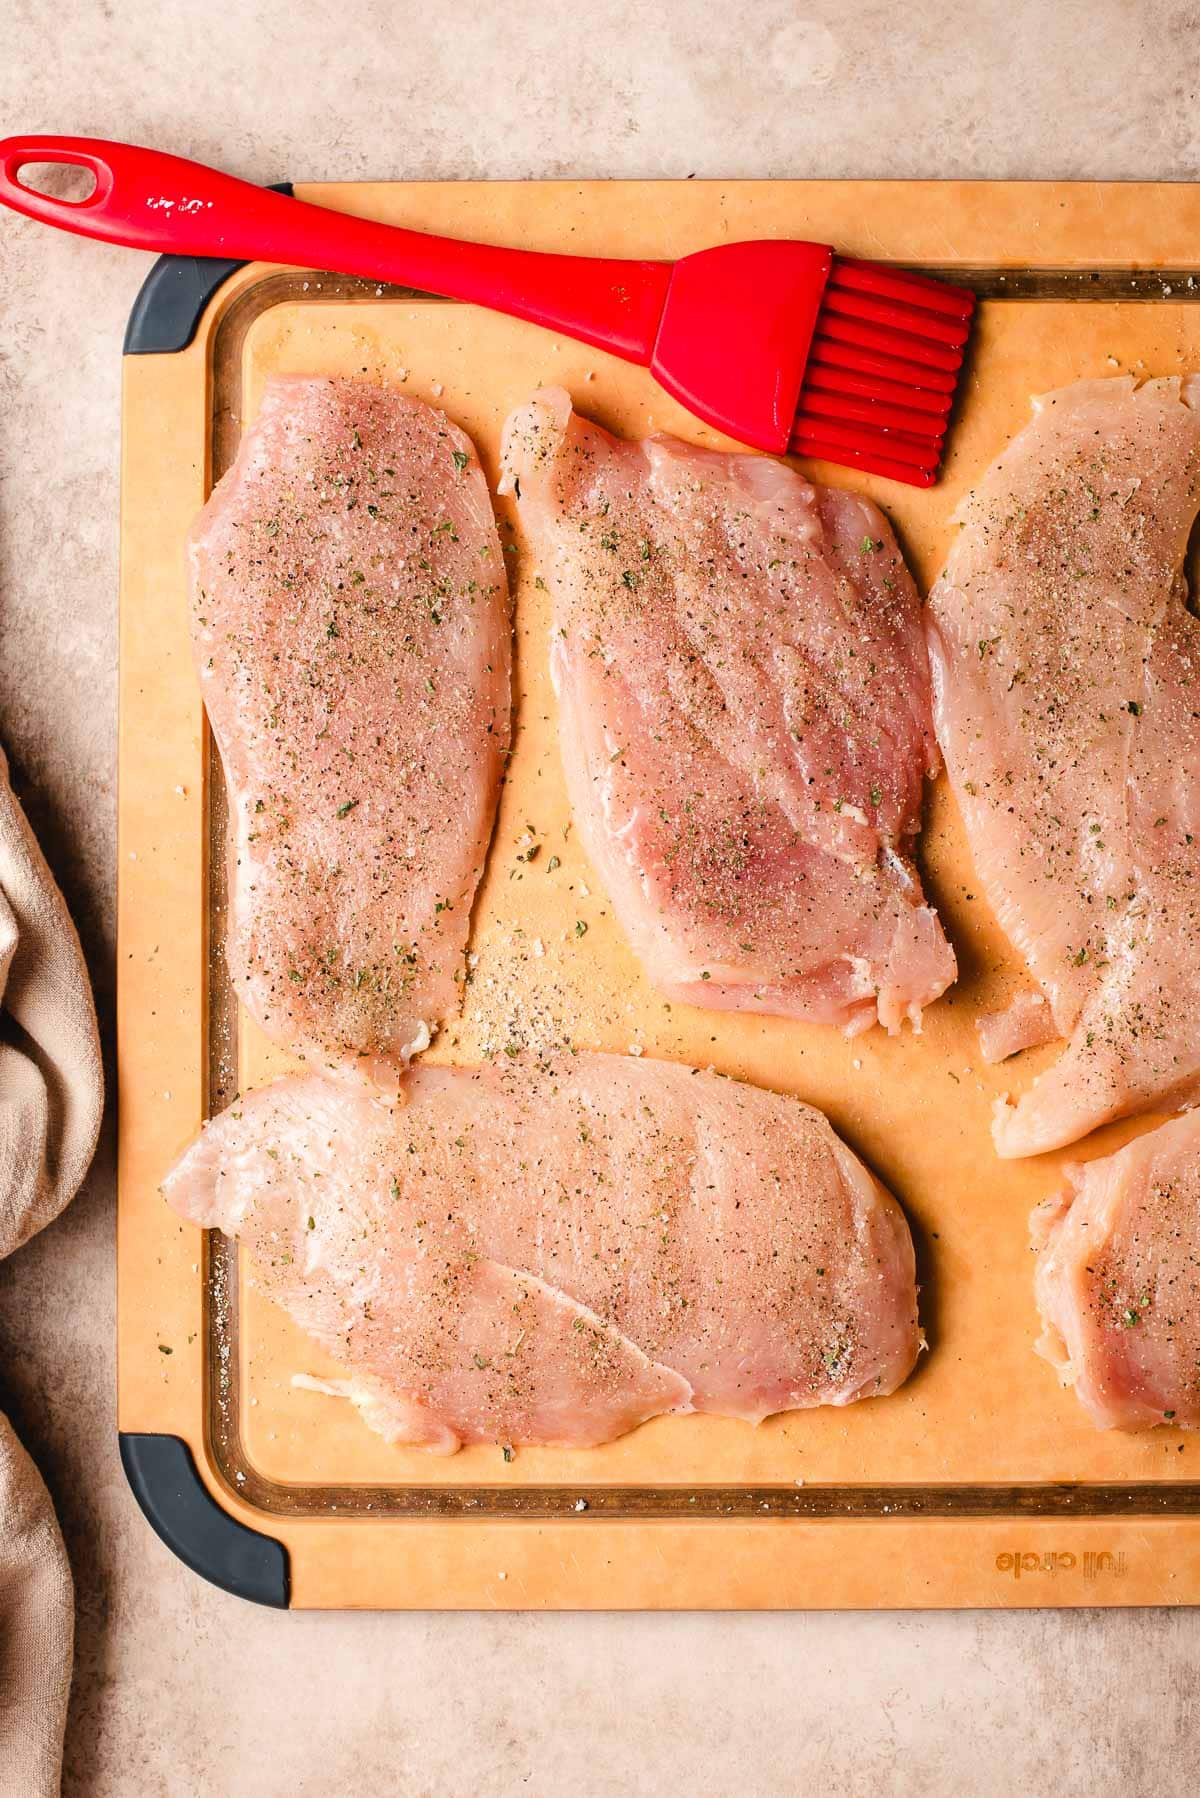
Step 2: Mix the salt, parsley, garlic powder, and pepper. Pat the chicken dry, brush lightly with olive oil, and season both sides.
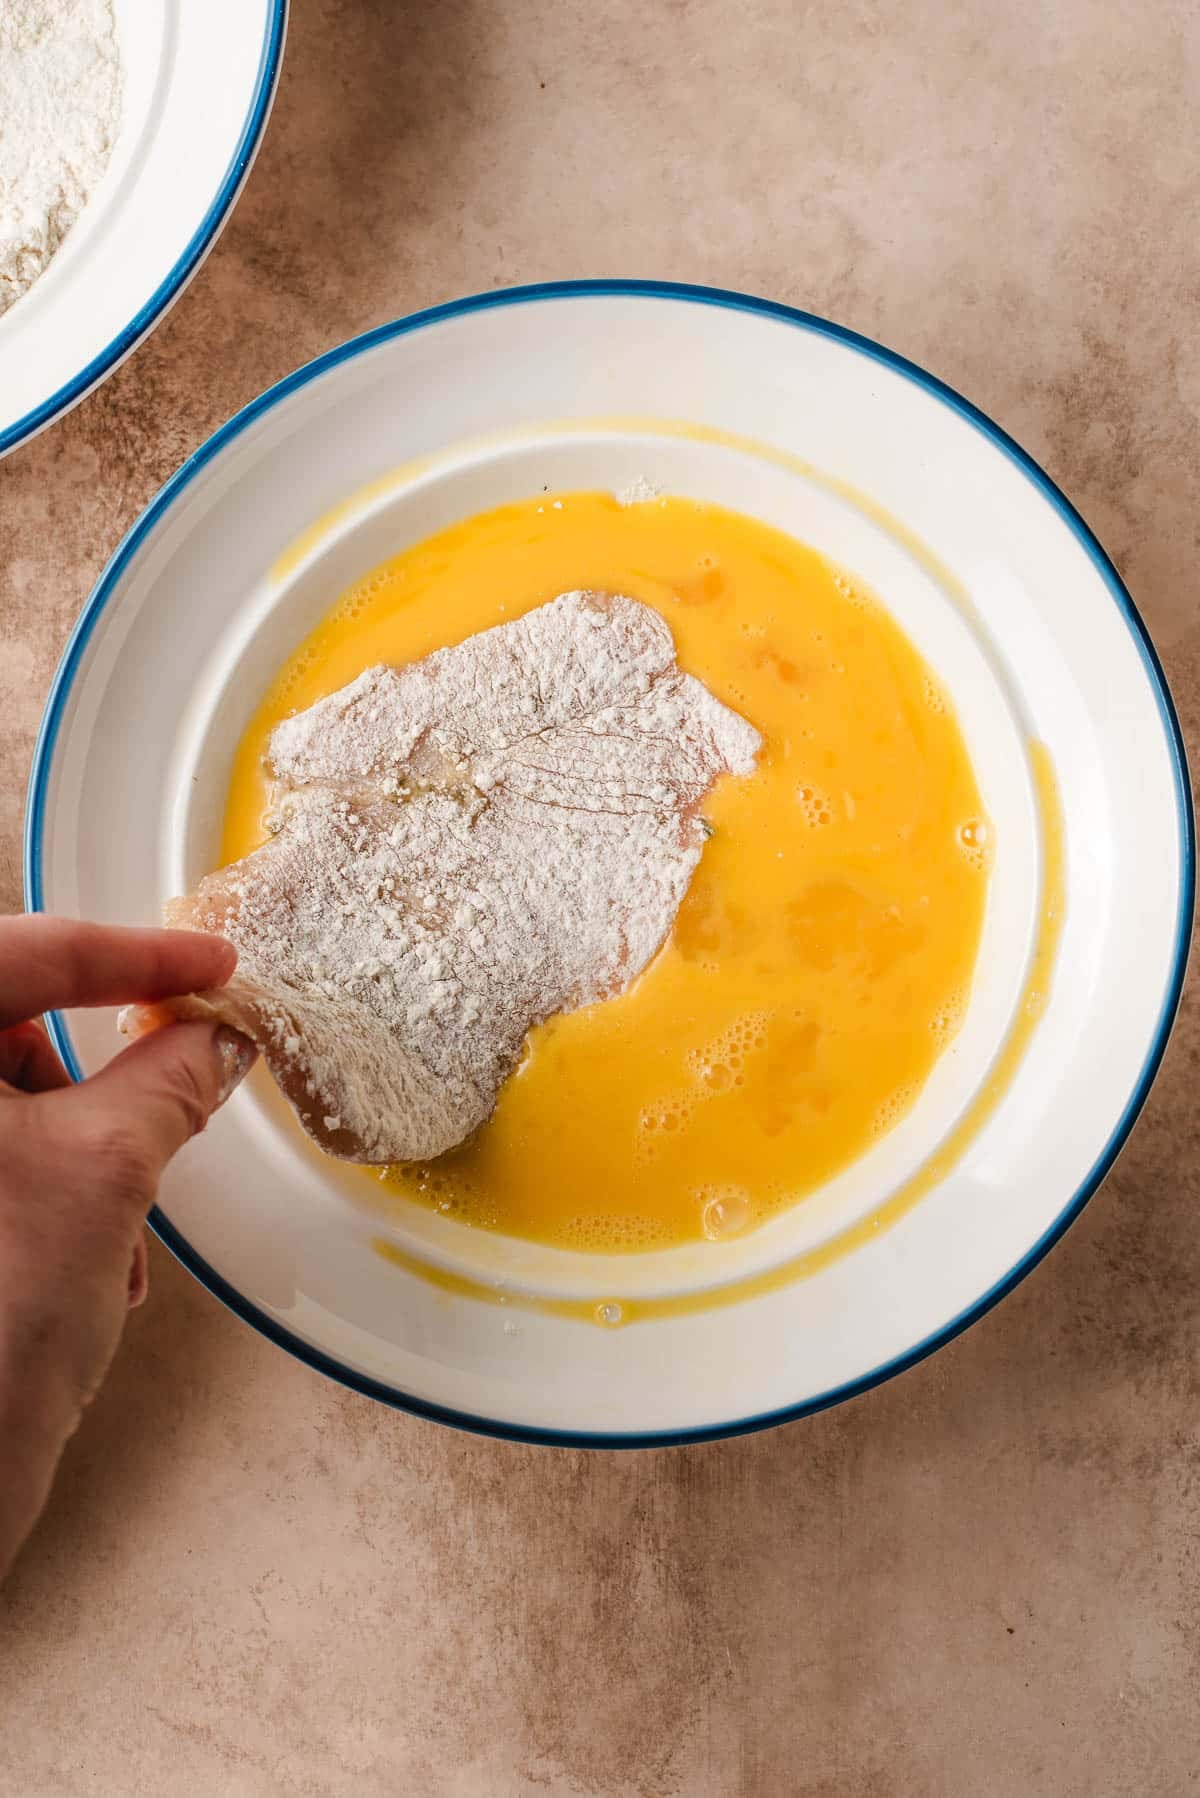
Step 3: Set up your breading station: flour, beaten eggs, and panko. Dredge in flour, dip in egg.

Step 4: Then, press firmly into panko to create evenly breaded chicken cutlets with full coverage.
Step 5: Preheat the oven to 200 degrees and place a cooling rack over a baking sheet. Heat a large cast iron skillet over medium heat. Add a tablespoon each of olive oil and vegetable oil. The oil should shimmer. If you want a temperature cue, you’re aiming for about 350-375 degrees. Drop in a breadcrumb – if it sizzles immediately, you’re ready!
*Keeping the heat steady is more art than science. I almost always lower the heat slightly after the first batch. If the oil starts to smoke, remove the pan from heat for a minute to cool down, then continue.
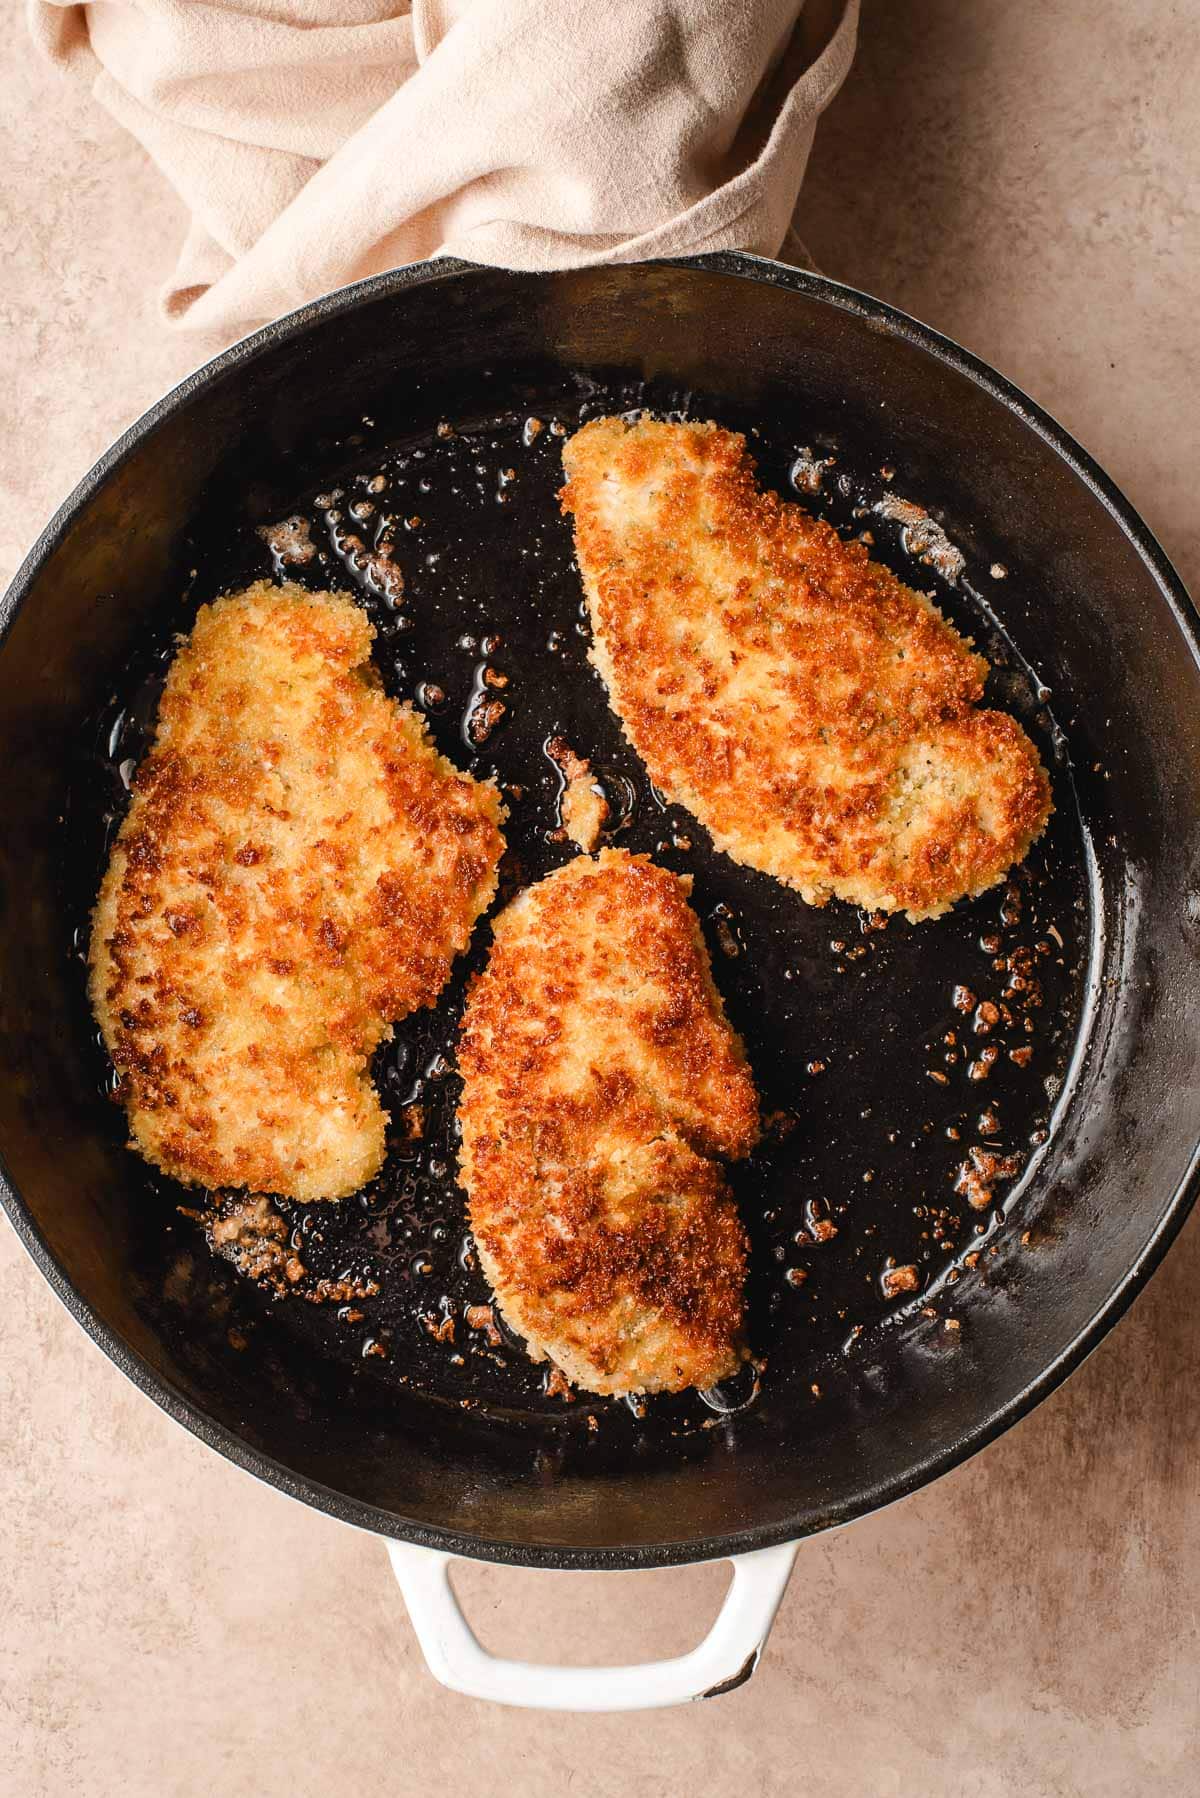
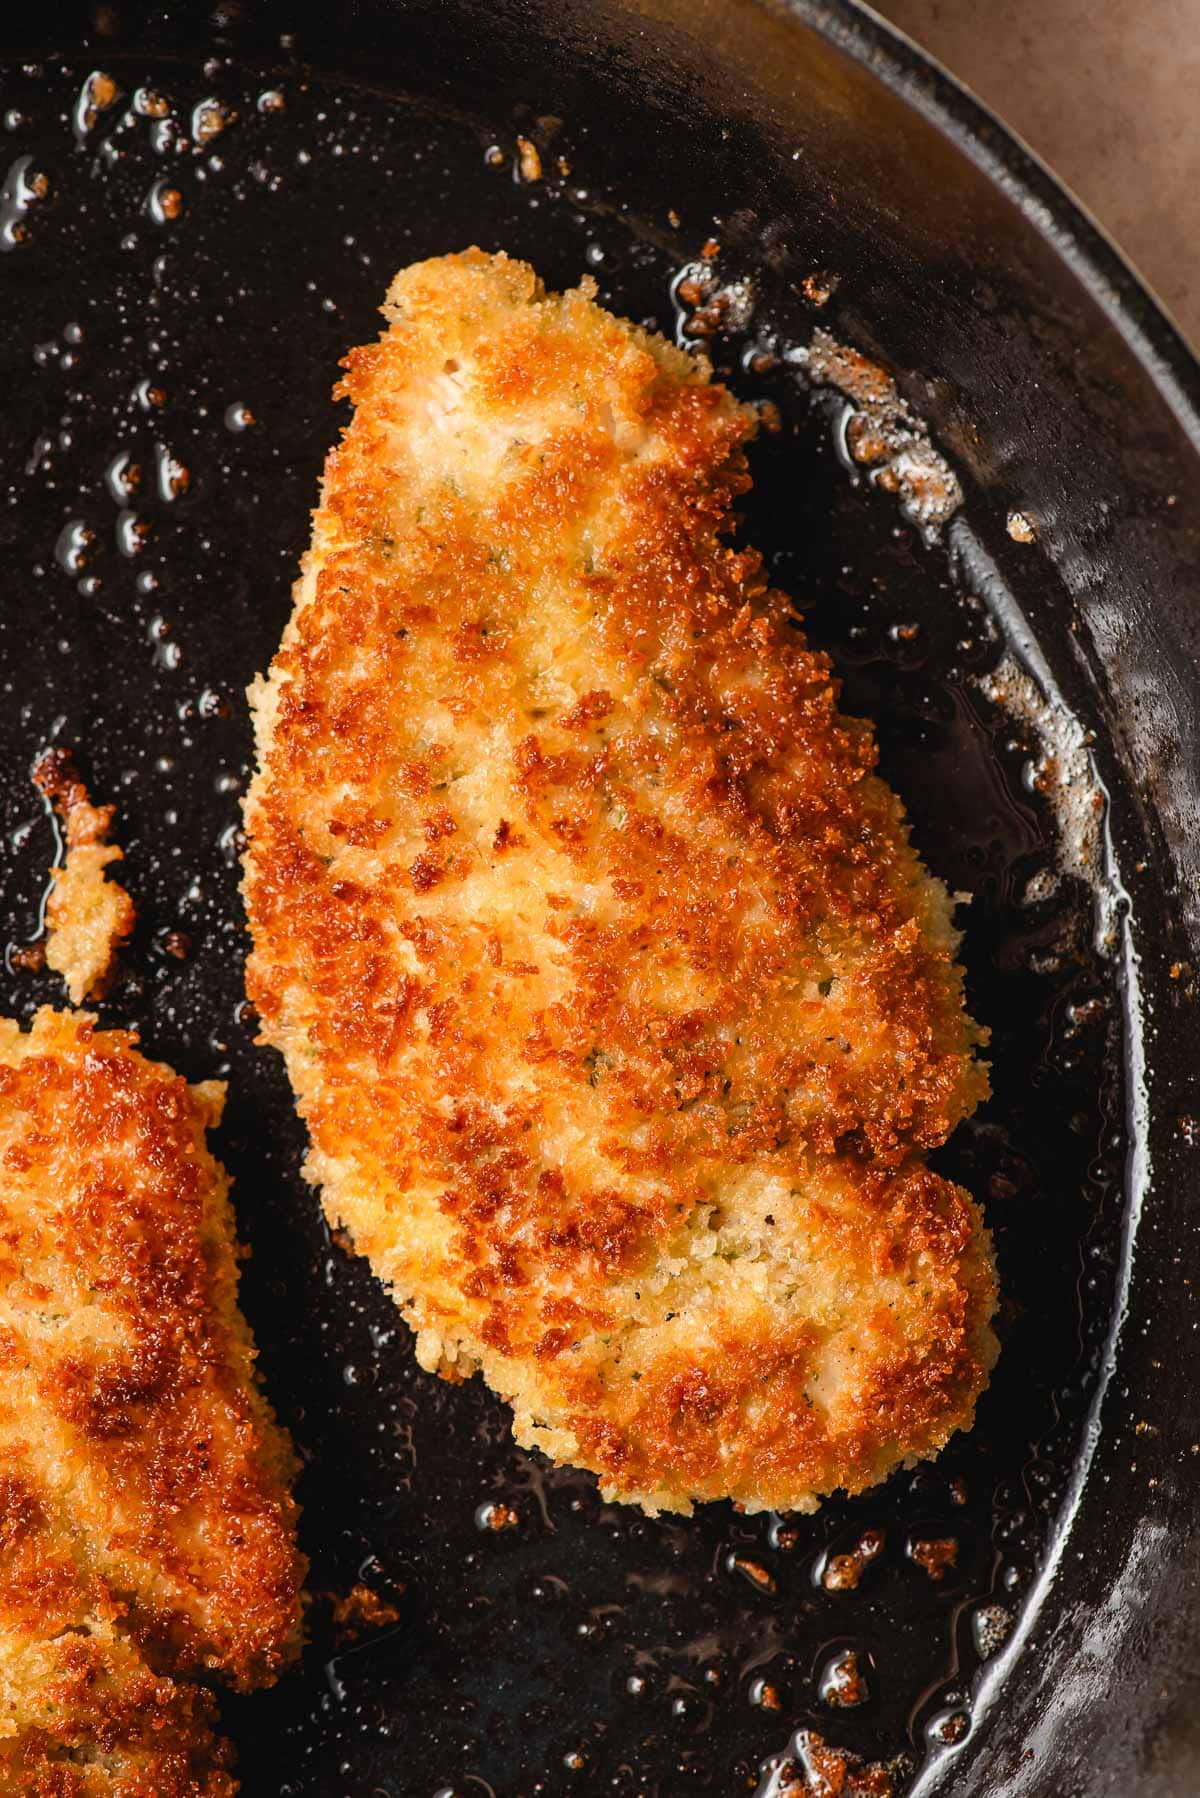
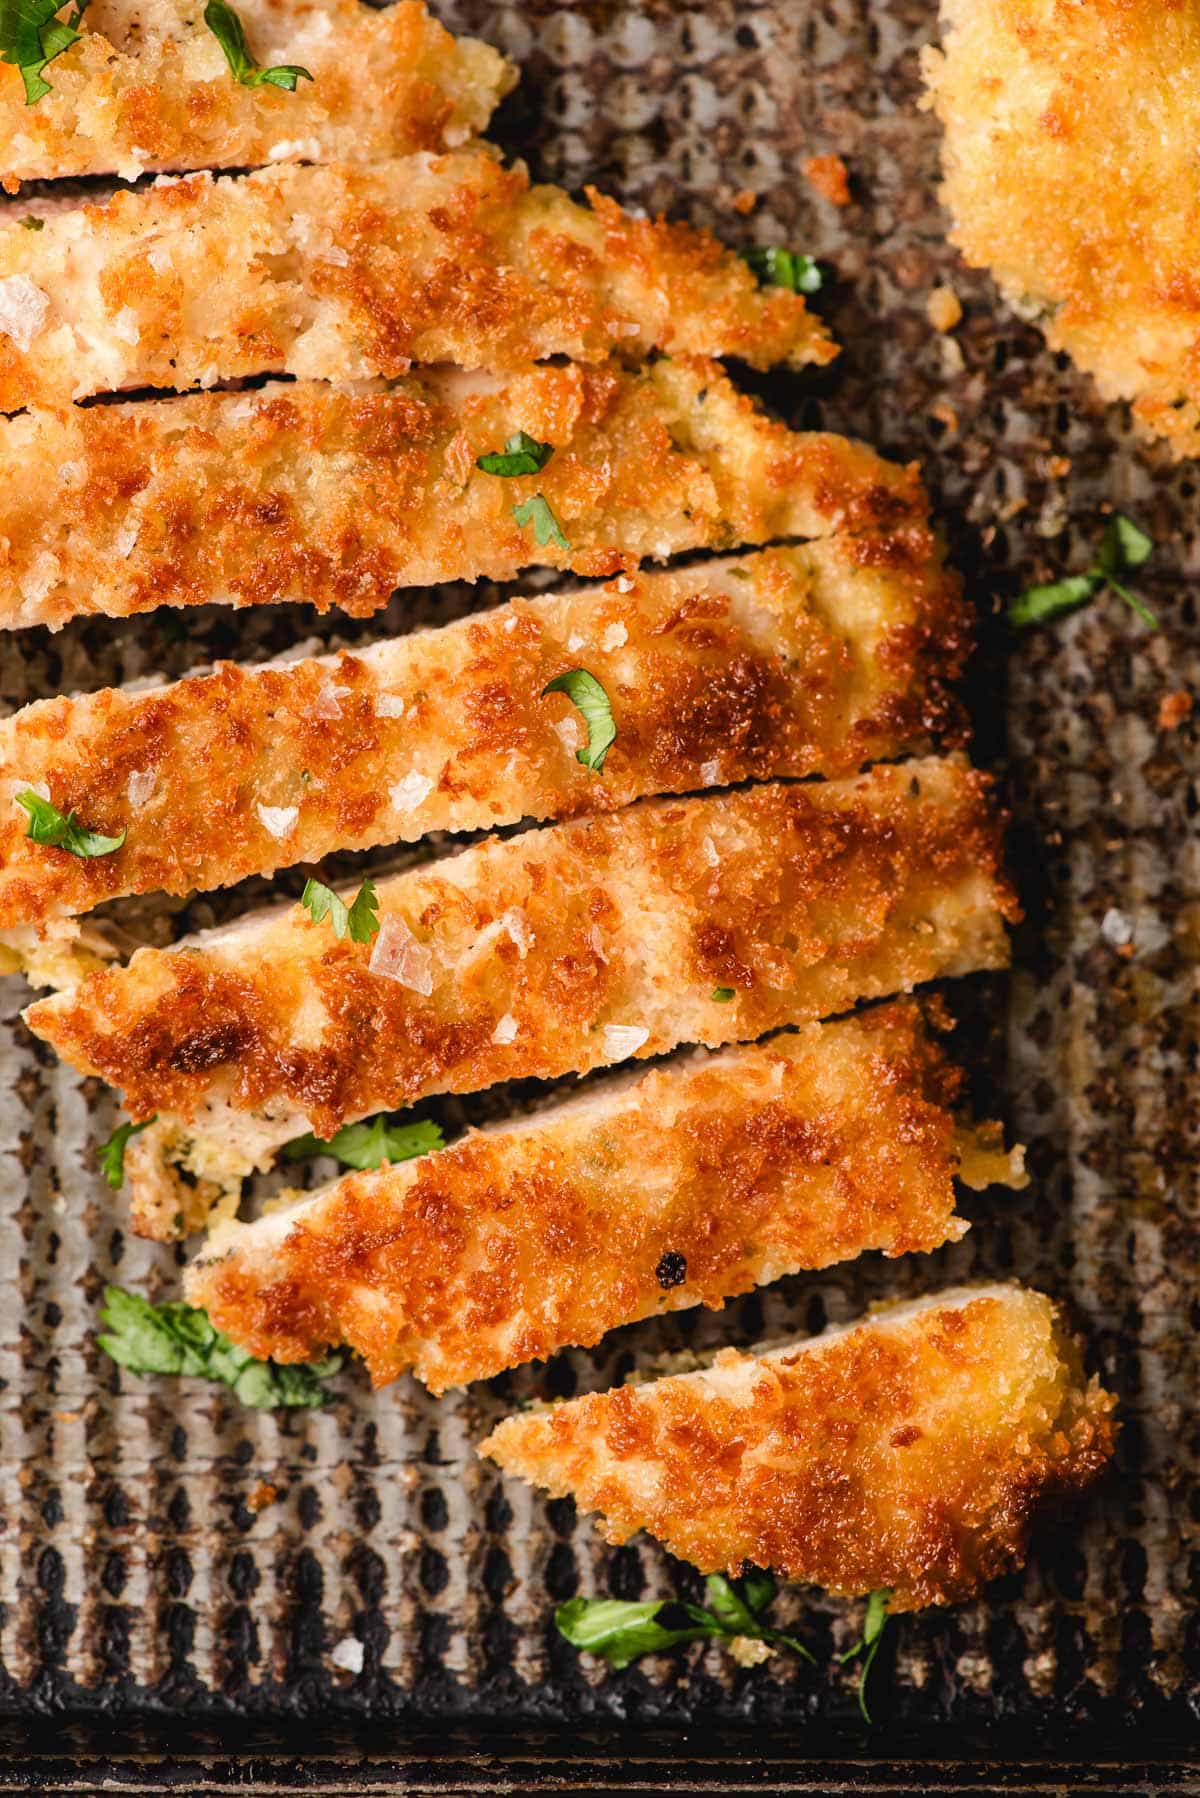
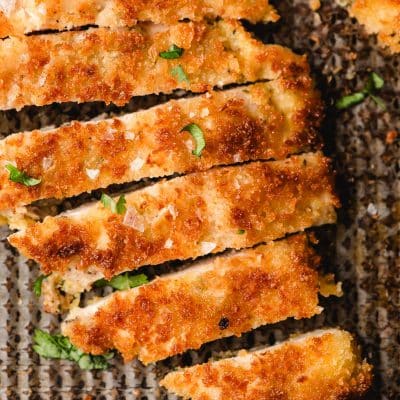
Step 6: Add 3-4 cutlets at a time and don’t crowd the pan. Cook 2-3 minutes per side until deeply golden and the internal temperature reaches 160°F. The temperature will rise to the USDA-recommended 165°F as the cutlets rest. Finish with flaky salt and herbs and serve immediately!
Troubleshooting Tips
- Cutlets are greasy: Oil was too cool. Increase heat slightly and avoid overcrowding.
- Breading isn’t sticking: Make sure the chicken is dry before dredging, whisk the egg well so it’s not too gloopy, and press panko firmly into the surface.
- Cutlets are pale: Oil wasn’t hot enough. Look for that steady sizzle.
- Chicken is dry: It is likely overcooked. These cook fast! Pull at 160 degrees.
Pro Tips for the Crispiest Chicken Cutlets
- Don’t flip too early: If the cutlets stick when you try to turn them, they’re not ready. A properly seared crust releases naturally.
- Press the panko firmly: Really press the breadcrumbs into the surface so they adhere and don’t fall off while frying.
- Let dredged cutlets rest 5-10 minutes before frying: This helps the coating hydrate slightly and stick better.
- Maintain proper oil temperature: Aim for 350-375°F for that perfect shallow fry.
- Cook in batches and add oil as needed: Avoid overcrowding the pan, which lowers the oil temperature and prevents the crust from crisping properly. If most of the oil is absorbed during the first batch, add another light coating before starting the second.
- Keep warm on a wire rack: After frying, place chicken on a wire rack in a low (200 degree oven) so the chicken stays warm and crispy.
Storage And Freezing Instructions
- Storage: Leftover fried chicken cutlets keep in an airtight container in the fridge for up to 3 days.
- Reheating: Skip the microwave. Use an air fryer at 350 degrees for a few minutes until hot and crispy again. It restores that crunchy coating beautifully.
- Freezing: Cool completely, freeze in a single layer, then transfer to a freezer bag.
How to Use Breaded Chicken Cutlets
- Sandwiches: Layer chicken on a toasted bun with lettuce, tomato, and mayo for a classic chicken cutlet sandwich.
- Salads: Slice and top our crispy chicken salad, creamy Caesar salad, or simple arugula salad for a quick lunch.
- Wraps: Add cheese, lettuce, bacon, and tomato, and serve with Ranch dressing for an excellent chicken bacon wrap.
- Chicken Parmesan: Top with marinara sauce and mozzarella, then broil for an easy chicken Parmesan.
- Substitute homemade crispy chicken cutlets in any of these frozen breaded chicken recipes, including chicken and waffles!
Recipe FAQs
Dredge completely in flour, then a well-whisked egg, then press the panko firmly onto the surface. Let the breaded cutlets rest 5-10 minutes before frying to help the coating adhere.
Keep the oil between 350-375°F. Too cool and they turn greasy; too hot and the crust burns before the inside cooks through. Look for a steady sizzle when the chicken hits the pan.
About ¼ inch thick. Thin cutlets cook quickly, stay juicy, and create more crispy surface area.
Cornstarch creates a lighter, extra-crisp crust. Flour gives a more classic, structured coating and helps the breading stick. For traditional crispy chicken cutlets, flour works best!
Once you master these, you’ll never go back to soggy, uneven breading again! They’re fast, dependable, and deliver that golden, crackly crust every single time. This is the kind of recipe you’ll come back to again and again.
More Easy Chicken Dinners
Join Our Community
Sign up for the NeighborFood email community to get recipes in your inbox ad free and access exclusive content from us! You can also follow us on Instagram and Pinterest. Made our recipe? Leave us a star rating or comment below!
The BEST Crispy Breaded Chicken Cutlets
Ingredients
- 3 Boneless skinless chicken breasts (about 1.75 lbs)
- 1 1/2 teaspoons Kosher salt
- 1 teaspoon dried parsley
- 3/4 teaspoon garlic powder
- 1/2 teaspoon black pepper
- 2 Tablespoons olive oil (plus more, if needed)
- 2 Tablespoons vegetable oil (plus more, if needed)
- ¾ cup all purpose flour
- 2 large eggs
- 1 1/2 cups panko bread crumbs
- Flaky sea salt (for finishing)
- Fresh herbs and lemon wedges (for serving, if desired)
Instructions
- On a cutting board, use a sharp knife to slice each chicken breast lengthwise, so they’re half as thick. Spread cutlets out, then top with a piece of parchment paper. Use a meat mallet or heavy rolling pin to pound the cutlets to an even thickness.
- In a small bowl, combine the Kosher salt, parsley, garlic powder, and black pepper. Pat the chicken dry, then brush both sides with some of the olive oil. Use your fingers to sprinkle the seasoning evenly on both sides of the chicken.
- Prep three shallow bowls for dipping: one with the flour, one with the eggs, whisked well, and one with the panko.
- Dip each chicken cutlet in the flour, coating both sides and shaking off any excess. Then, coat with the egg on both sides. Finally, press each side into the panko crumbs. You can move the chicken back to the cutting board while you dredge the remaining cutlets.
- Preheat the oven to 200 degrees and place a cooling rack over a baking sheet.
- Heat a large cast iron skillet or heavy pan over medium high heat. Add a tablespoon each of olive oil and vegetable oil to the pan. Heat until it is shimmering, but not smoking, about 375 degrees. Add several chicken cutlets to the pan, without crowding. Cook 2-3 minutes, or until golden brown. Flip, and cook another 2 minutes. The chicken should register at least 160 degrees. Remove the chicken to the cooling rack and place in the oven to keep warm. Repeat with remaining cutlets, adding additional oil as needed.
- Sprinkle the finished chicken with flaky salt and sliced fresh herbs, if desired, then serve.
Notes
- Keeping the heat at the right temperature is more art than science. I usually find I need to turn the heat down a bit after the first batch.
- If your oil starts to smoke, remove the pan from heat for a minute to cool down, then continue.
- A combination of olive oil and vegetable oil helps keep the oil from burning. If you’d like, you can use another neutral oil, like avocado oil.
- Cook the cutlets in two batches to avoid over crowding the pan and ensure they get crispy.
- If the majority of the oil is soaked up by the first batch of cutlets, make sure to add another coating before the second batch.
Nutrition
Did you make this recipe?
Leave a review, Mention @NeighborFoodie, or tag #neighborfoodies!
Leave a Reply