
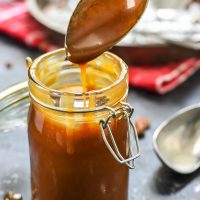
Salted Caramel Sauce is the exclamation point for all of your holiday recipes. This easy homemade caramel adds amazing flavor to all kinds of desserts, drinks, and breakfast dishes. Use it as a dip for apple slices or drizzle it over pancakes, ice cream, cakes, or pie.

Table of Contents
Homemade Salted aCaramel Sauce For All the Things
I first made this Homemade Caramel Sauce five years ago. I screwed it up royally, and somehow it was still ridiculously good. I knew then this sauce would be a mainstay in my holiday rotation, and indeed, it is.
It usually makes its inaugural appearance in October, when we bring our first load of apples home from the orchard. Unsurprisingly, salted caramel sauce and apple slices get along quite well.
Another batch is usually required for Caramel Apple Cider Floats and then another for dipping Wonton Apple Pies. In the in-between time, it gets drizzled on Buttermilk Pancakes and Apple Overnight French Toast Casserole, swirled into Cinnamon Lattes and licked right off the spoon.
At Thanksgiving, you’ll find the homemade caramel sauce stationed next to the Caramelized Apple Pies, ready to take all of your holiday desserts to the next level, and at Christmas it gets poured into cute jars and tied with ribbon for everyone’s favorite DIY gift.
My friends have started calling this THE SAUCE, and it’s certainly earned its reputation. The sauce is remarkably easy to make, and it’s one of those recipes where the reward far outweighs the work required. Trust me, you’ll have to restrain yourself from licking the flaming hot pot you make it in. It’s that good.
Courtney
Key Ingredients
Now, I promise this recipe really is easy. You’ll only need these four ingredients:
- Sugar– For the best results, use granulated cane sugar for this recipe.
- Heavy Whipping Cream– You can use cream marked as heavy whipping cream or just whipping cream, but do not substitute half and half or milk.
- Sea Salt– I like to use flaky sea salt for caramel, but Kosher salt or sea salt also work well. Adjust the salt to your liking.
- Vanilla Extract– A little bit of vanilla rounds out the caramel flavor. If I’m feeling extra extravagant, I’ll scrape out a vanilla bean or use this Madagascar bourbon vanilla paste.

How to Make Salted Caramel Sauce
Step 1: Warm Cream. Heat the cream in the microwave or over the stove until warm, but not boiling. This is really important! Heating the cream helps prevent the mixture from seizing up when you add it to the pan.
Step 2: Melt sugar. In a large heavy pot, spread sugar in a thin, even layer. Turn burner to medium and heat, stirring often. The sugar will form clumps, then slowly begin to liquefy. Gently stir, making sure unmelted sugar comes in contact with the greatest heat source. Continue to cook until the sugar is completely melted and has turned a rich amber color.
Step 3: Add cream. Drizzle in about 1/4 of the cream, whisking constantly. The mixture will bubble a lot. Slowly whisk in the remaining cream until smooth.
Step 4: Add salt and vanilla. Whisk in the vanilla and salt, to taste.
Storage and Make-Ahead Instructions
- Caramel sauce should be cooled completely then stored in an airtight container in the fridge. It will last for up to 1 month.
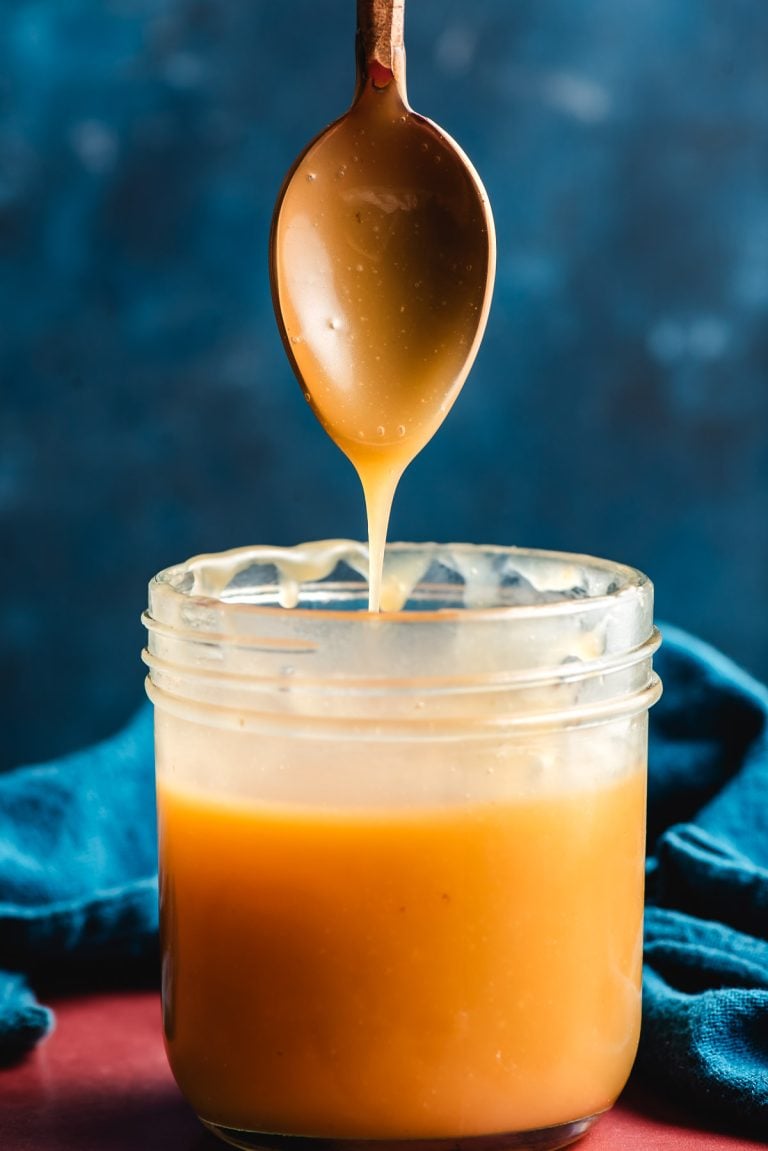
- Note that the caramel will thicken significantly once it’s cooled. Cold caramel is amazing as a dip for apples or pretzels. To use it as a sauce, heat it in the microwave until pourable.
How to Save Seized Caramel
If any of the caramel hardens, place it back over low heat and stir gently until melted. This may take several minutes. Alternatively, you can pour the caramel mixture through a fine mesh sieve to catch any bits that hardened.
Ways to Use Salted Caramel Sauce
- Add it to drinks. Stir salty caramel into Vanilla Iced Coffee or a Honey Latte for a drink that feels like it came from a fancy coffee shop.
- Use it for breakfast. Drizzle caramel sauce over Apple Cinnamon Pancakes, French Toast, or a Breakfast Banana Split.
- Drizzle it on all of your desserts. This caramel sauce is amazing on Ice Cream Crepes, Apple Cider Bundt Cake, and Apple Crumb Cake.
Join Our Community
Sign up for the NeighborFood email community to get recipes in your inbox ad free and access exclusive content from us! You can also follow us on Instagram and Pinterest. Made our recipe? Leave us a star rating or comment below!
Homemade Caramel Sauce
Ingredients
- 1 cup granulated sugar
- 1 1/4 cups heavy cream
- 1/2 – 3/4 teaspoon sea salt
- 1 1/2 teaspoons vanilla
Instructions
- Heat the cream in the microwave or on the stove top until warm but not boiling. Set aside.
- In a pot or saute pan with a large surface area, spread sugar in a thin, even layer. Turn burner to medium and heat until parts of the sugar begin to liquefy. The sugar will form clumps before going liquid. This part feels like it takes awhile, but once it starts to melt it will go fast.
- Gently stir, making sure unmelted sugar comes in contact with the greatest heat source. Continue, stirring often, until all the sugar is melted and turns a deep amber color. If it seems to be going too fast, lower the heat.
- Dribble a small stream of the cream into the caramel whisking constantly. It will bubble a lot and be slightly terrifying. Continue to add the cream, a little at a time, whisking. Once about half the cream is incorporated, you can add the rest in a steady stream, continuing to whisk until smooth.
- Stir in vanilla and salt, to taste. Serve warm or pour into an airtight container and cool completely, then refrigerate. The caramel will thicken considerably when cold. It's great used as a dip this way, or you can rewarm it in the microwave to drizzle on your favorite drinks and desserts.
Notes
- If I’m feeling especially extravagant, I’ll use the seeds from 1 vanilla bean or 1 1/2 teaspoons vanilla bean paste instead of the extract.
- If any of your sugar mixture clumps up when you add the whipping cream, you can strain the caramel through a fine mesh sieve to catch any clumps before serving.
- Caramel will keep in the fridge for up to 2 weeks.
Nutrition
Did you make this recipe?
Leave a review, Mention @NeighborFoodie, or tag #neighborfoodies!

Leave a Reply