Fruity Pebbles Treats
May contain affiliate links. See our disclosure policy.
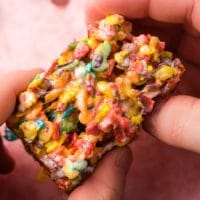
If you loved slurping up the pink hued milk after eating a bowl of Fruity Pebbles cereal, you’re going to love these Fruity Pebble Treats! These colorful, soft, and gooey Fruity Pebbles Rice Crispy Treats are super fun and made in just 15 minutes!

What’s saving your life right now? It’s a question I’ve heard asked in blog posts and podcasts, but one that feels particularly important right now. In this season of anxiety and uncertainty, what’s making you laugh, lifting your spirits, and helping you get you out of bed every morning?
For me? It’s warmer weather. Long walks. Bingeing Brooklyn 99. The Common Prayer App. Drive Thru Ice Cream Shops. The Popcast. Baking with my kids. And bright, colorful, sugary Fruity Pebble Bars.
Apparently one of my coping strategies is revisiting all my favorite foods from childhood. I bought Pop Tarts for the first time in years, and a family sized box of Fruity Pebbles made its way into my cart too. What can I say? My brain needs all the happy, nostalgic foods right now.
I was excited to make these no bake treats with my oldest, who absolutely LOVES marshmallows, but things didn’t quite go as planned. When it was time to pour all the marshmallows into the pot to be melted, he was devastated. “MOMMY! You’re waaaasting them!”
Luckily, he soon learned the marshmallows were not sacrificed in vain, because gooey Fruity Pebble Bars are the sweetest, most fun dessert around.
These treats are so easy to make, and thanks to a special secret ingredient, they stay soft for DAYS. Read on to find out how to make the best Fruity Pebble Rice Krispie Treats!

The Secret Ingredient to Soft Fruity Pebble Bars
I love a good, gooey Rice Krispie treat as much as the next girl, but I think we’ve all experienced enough hard, scratch-the-roof-of-your-mouth treats to know that not all marshmallow treats are created equal.
Luckily, no one has to settle for scratchy marshmallow treats ever again, with these simple tricks:
- First off, the secret ingredient: Sweetened Condensed Milk. I picked up this tip over at The Kitchn, and I use it for all of my cereal treats now. Condensed milk is the KEY to gooey, soft treats that taste like cereal milk!
- My other favorite trick is to amp up the marshmallows. The usual cereal to marshmallow ratio for Rice Krispie treats is 4 cups mallows to 6 cups cereal. This version uses 6 cups marshmallows for the same amount of cereal. I also love to add another cup at the end that doesn’t quite melt all the way so you have pockets of mallow spread throughout the treat.

How to Make Fruity Pebble Treats
Now that you know the secret ingredients, let’s make some treats! These no bake bars are ready in less than 15 minutes.
- Grease a square (8×8 inch) baking pan with butter or cooking spray.
- Start by melting butter in a large pot over medium heat. Stir in the sweetened condensed milk and cook until bubbling. This happens quickly–in about 1-2 minutes! Stir in a fat pinch of salt and splash of vanilla.
- Turn the heat down to low and add the marshmallows, stirring until melted. Turn off the heat, then gently stir in the cereals and reserved cup of marshmallows until they’re combined.
- Pour into the pan and gently spread out. Allow to cool before cutting (or just tear off hunks of it, because you can’t resist! <<<not that I know anything about this).

More Tips for Fruity Pebble Treat Success
- Don’t overcook the marshmallow. I always recommend melting the mallows over low heat, and removing them as soon as they’re melted. Just like candy, the longer they’re cooked, the harder they’ll become.
- Don’t pack the treats into the pan. Instead, grease your fingers with cooking spray and use them to gently spread the cereal into the pan. Packing leads to dense, hard bars rather than the light and fluffy treats we want!
- My Fruity Pebble treat recipe includes 2 cups of plain Rice Krispies. You can absolutely use all Fruity Pebbles if you prefer, but I found this version to be a tad too sweet for my taste. Subbing in some plain Rice Krispies made these just right!
- Want gluten free Fruity Pebbles treats? Fruity Pebbles are naturally gluten free, but unfortunately Rice Krispies aren’t. However, several brands make a gluten free rice cereal that would work great in these! Simply swap that in and you’re good to go!

How to Store Fruity Pebble Rice Crispy Treats
Store marshmallow treats in the pan tightly covered with plastic wrap. If you’re making these ahead of time, I recommend waiting to slice them until right before serving.
I love using this pan with a removable bottom for brownie and bar recipes. It allows you to remove the bars from the pan in a single slab and wrap and store them that way.
The important thing is to keep them airtight. Fruity Pebble Crispy Treats stored in an airtight container will stay soft and gooey for at least 3 days!

More No Bake Treat Recipes
Fruity Pebbles Treats
Ingredients
- 5 Tablespoons butter
- 1/3 cup sweetened condensed milk
- 7 cups mini marshmallows (divided)
- Pinch sea salt
- Splash of vanilla extract
- 4 cups Fruity Pebbles cereal
- 2 cups Rice Krispies cereal
Instructions
- Grease a 9x9 or 8x8 inch square baking pan.
- In a large pot, melt the butter over medium heat. Add the sweetened condensed milk and heat until bubbling. This will only take a minute or two! Stir in the vanilla and salt.
- Turn the heat down to low and add 6 cups of the marshmallows. Cook, stirring often, until melted. Stir in the Fruity Pebbles, Rice Krispies, and final cup of marshmallows. Stir the mixture gently until combined.
- Pour the pebble mixture into the greased pan. Grease your fingers with butter or cooking spray and use them to gently spread it evenly over the pan. DO NOT PACK DOWN.
- Allow the mixture to cool before cutting into squares.
Notes
- If you're making these ahead of time, leave them in a single slab and wrap tightly with saran wrap. Treats will stay soft for about 3 days.