Homemade Creamy Hummus Recipe
This post may contain affiliate links.
This Creamy Hummus Recipe is the best way to create dreamy homemade hummus. Follow our DIY hummus recipe to go from a can of chickpeas to a luxuriously smooth hummus with the perfect balance of lemon, garlic and sesame.
We love hummus around here. But like the song says, “There ain’t nothing like the real thing, baby.”
Table of Contents
Hummus may be a perfect food. It can be a party side dish, an appetizer, or used as a condiment to spread on your favorite sandwich or wrap. Plus, you can dip almost anything into hummus! It’s great on bread, veggies, meat or pita chips.
And it can contain a rainbow of different flavors, ingredients or seasonings. Look no further than the Sabra hummus shelf or that multi-flavored hummus wheel found in most grocery stores to prove my point. No matter whether it’s spicy, savory, herby or sweet, hummus is awesome…
That is… unless it’s not.

Make the Best Hummus Recipe at Home
Store-bought hummus is notoriously hit-or-miss, so do me a favor: reserve your final judgment about hummus until you’ve gone to a restaurant with Middle Eastern cuisine and tasted a fresh, genuine version of this magical dip.
Once you’ve experienced the subtle dance of flavor and texture that a real authentic hummus recipe can offer, it’s like seeing in color for the first time. You’ll never go back to those flat homogenized tubs of beige paste again.
Our goal with this Creamy Hummus Recipe is to bring that authentic experience home into your kitchen so you can make your own hummus whenever you like.
And while I wouldn’t exactly call this a quick and easy hummus recipe, it uses just a few simple ingredients and with a little time and effort, you can turn canned chickpeas into the best homemade hummus recipe you’ve ever tasted.

Ingredients for Our Creamy Hummus Recipe
- Canned Chickpeas – The foundational ingredient in hummus is chickpeas (also called garbanzo beans). They give hummus it’s color, texture, and subtle nutty flavor. Dried chickpeas usually have to be soaked overnight and then slowly sauteed. If you’re using dry chickpeas, follow this recipe. That all takes way too long for us, so we’re using canned chickpeas. (They’re more widely available in grocery stores anyways.) This is one shortcut that is totally allowed in this recipe.
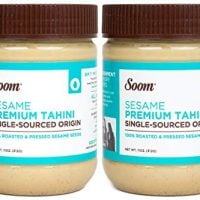
- Tahini paste – Pureed and fermented sesame seeds doesn’t sound like something we have time to master, so we’re going with store-bought brand Soom tahini paste. If it’s good enough for Chef Michael Solomonov (his hummus wins awards), then it’s good enough for us. For nuanced authentic flavor, this sesame paste is a key ingredient to up your hummus game.
- Lemon juice – A squeeze of fresh lemon juice adds a bright citrus to this hummus and can easily be adjusted to your preference. We start with the juice of 1/2 lemon.
- Garlic cloves – Use fresh garlic cloves that aren’t green in the middle. They compliment the savory flavors in this hummus.
- Olive oil – This ingredient can make or break your hummus. We have a lot to say about oils, but our general advice for this recipe is:
- Firstly, don’t use old oil. While olive oil has a shelf life from 1-2 years, that’s in a sealed bottle. Once you open the seal, you want to use it within 2-4 weeks for best flavor.
- Second, store your olive oil in an airtight container in a dark dry place. I know those tall clear glass bottles with the flippy metal pour spouts and all the colorful herbs inside look nice, but there’s a reason olive oil is bottled in sealed dark green glass or opaque corked jars. Sunlight, heat, and contamination from other strong smells/ingredients and humidity in the air cause olive oil to degrade, and eventually go rancid. If it smells bad, or tastes sour or bitter, get rid of it.
- Third, taste test it first. Bolder oils will have a robust earthiness on your tongue, a “behind your teeth” acidity, or a peppery sharpness that you’ll either love or hate. Make sure the flavor of your oil will go with the other ingredients of this creamy hummus recipe by smelling them close together before you start. The olive oil you choose is a crucial component of this hummus since you’ll be drizzling it on top to serve and it will be the first thing that hits your taster, so pick an olive oil that you love. (If you have a local oil shop near you, go there and try samples. It’s fun, informative, and you’ll leave with some high quality ingredients.)
- Salt – Regular old table salt works fine for in the hummus (and is easier on your blender/food processor), but feel free to garnish yours with some larger fancier flakes or coarser sea salts for serving.
- Fresh parsley and paprika – Mostly for a finishing touch of color, and adding just a hint of flavor at the end.

Tips for the BEST Creamy Hummus
Homemade hummus is a labor of love and it pays to mind the details. To achieve the best results here’s some tips to follow:
Use high quality ingredients.
You don’t need to press your own olive oil, but other than the canned chickpeas and tahini, using fresh, quality ingredients makes a huge difference in this creamy hummus recipe.
Use the right equipment.
Unless you have the top performing high-powered blender on the market, we’d recommend using a food processor to make this creamy hummus recipe.
You might have no problem with a smoothie or an Orange Julius, but as shown in this blender review video, not all blenders have the motor power, blade speed, and jar design to handle the difficult task of producing nut butters with a smooth texture.

So, to avoid a hummus with a gritty texture (and possibly damaging your blender) make sure to use the right tool for the job.
Take your time.
Because this creamy hummus recipe only has about 7-8 simple ingredients, make sure to take your time measuring properly, scraping the blender bowl down frequently as you mix to ensure a uniformly smooth texture, and tasting samples as you go.
Also, I know you’ll hate me for recommending it, but Peel the Chickpea Skins.
How to Peel Chickpeas
Yes, it’s tedious, awkward, and time consuming, but trust me, IT WORKS, and it is worth it.
It took me about 20 minutes to remove the chickpea skins from the drained chickpeas.

There are two methods you could use for skinning the beans.
- Once you have rinsed and drained the canned chickpeas, pick up a bean and hold it between your thumb and pointer finger. Gently squeeze at one end until the skin slides off the bean. Repeat with the rest of the beans. Or…
- Warm the beans in the microwave or in a skillet for 2-3 minutes. Place them in a large bowl and fill it with cold ice water. Rub the beans between your hands, and the skins will fall off and float to the surface. You may have to repeat this 2-3 times to get all of them.
No other single variable in this creamy hummus recipe has such a profound effect on the final result than prepping your chickpeas (aka garbanzo beans) by removing the chickpea skins.
How to Make Creamy Hummus
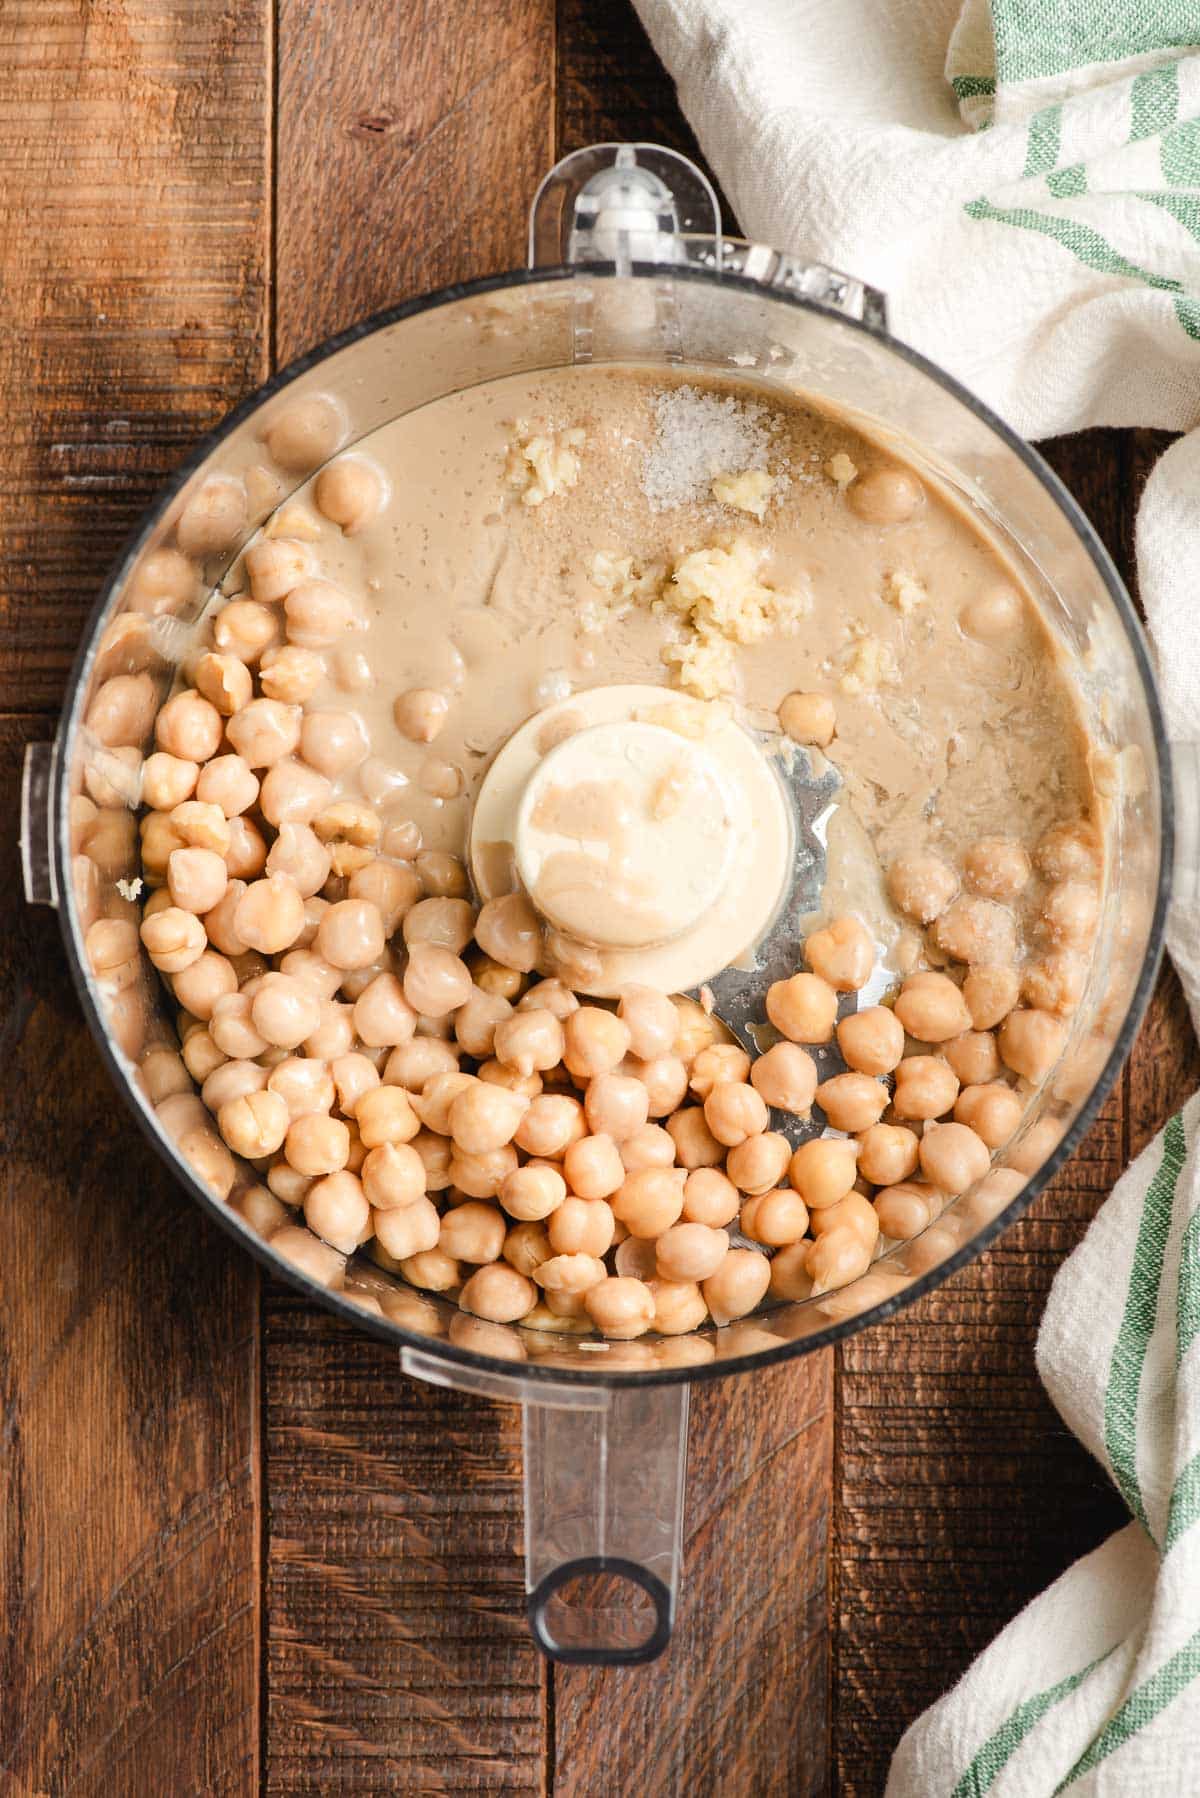
- Peel your chickpeas. (See above) Be sure to save some of the water from the can.
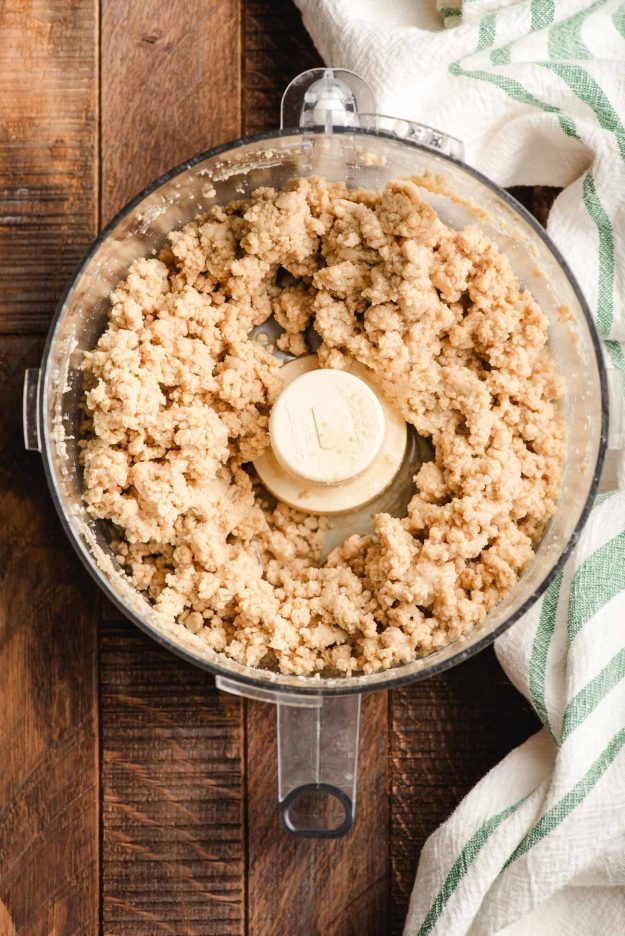
- Blitz the chickpeas in your food processor until they’re the consistency of sandy crumbles.
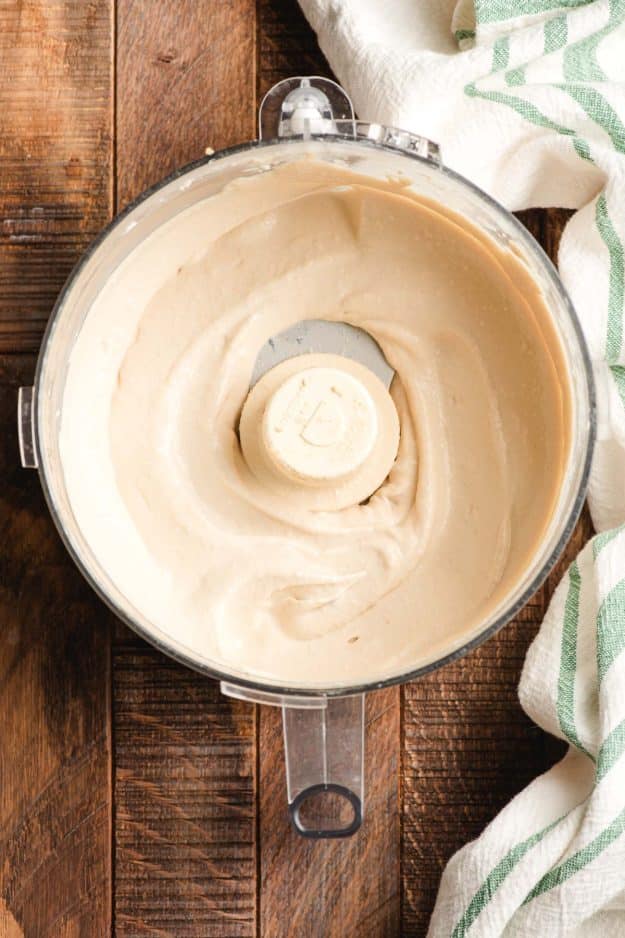
- Add the tahini, lemon juice, garlic, and salt. Blend and scrape the bowl frequently, slowly adding the canned chickpea water until the hummus is completely smooth.
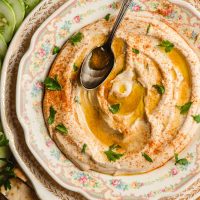
- Top with a drizzle of olive oil, parsley, salt and paprika to taste.
The result is a silky smooth hummus with that authentic made from scratch smooth texture, and delicate balanced flavor that will run circles around the store-bought varieties.
Cover any leftover hummus with plastic wrap or seal in an airtight container and refrigerate for up to 5 days.

What to Serve with a Bowl of Hummus
Warm pita bread, fresh cut carrot sticks, melba toast, and cucumber coins are some of our favorites. But you can enjoy this healthy homemade hummus as the centerpiece of just about any pretzel assortment, cracker tray, charcuterie or vegetable platter.
If you want to hit an Eastern Mediterranean appetizer trifecta, serve this creamy hummus alongside our Spicy Turkish Ezme Salad, our classic Lebanese Tabbouleh or this fresh Israeli Salad. The colors and flavors go perfectly together!
We always have this creamy homemade hummus with our Ground Beef Kafta Kebabs, and if you like it with savory spiced meats, it would go great with our 30 minute Ground Beef Gyros, Gyro Bowls, or these Grilled Steak Kabobs as well.
Homemade Creamy Hummus Recipe
Ingredients
- 15 oz canned chickpeas
- 1/2 cup tahini paste
- Juice of 1/2 a lemon
- 2 cloves garlic (roughly chopped)
- 3/4 teaspoon salt (or more to taste)
- Reserved chickpea water from the can
- Olive oil, parsley, paprika for serving
Instructions
- Drain the chickpeas, reserving the juice in a small cup.
- Remove the skins from the chickpeas. I find the easiest way to do this is to pinch the chickpeas between your thumb and forefinger, with the pointy side facing your hand. Squeeze the chickpea and the skin should pop right off. Place the skinned chickpea in the blender, and the skins in the trash.
- Once all the chickpeas are skinned and in the blender (or food processor), pulse until the chickpeas are in sandy looking crumbles. You may need to stop and shake the blender and/or scrape down the sides a few time.
- Add the tahini, lemon juice, garlic, and salt, and blend until smooth, scraping the bowl as needed.
- Slowly add the chickpea water to the mix until the mixture can blend without catching and is completely smooth. I usually use nearly all of the reserved water.
- I like to chill the hummus for an hour or so. To serve, top with olive oil, parsley, and sprinkle with paprika.
Video
Notes
- Store leftovers in an airtight container in the refrigerator for up to 5 days.

hi,
skinning beans is so easy, just dump cooked beans or from can into a pot of water, and like you say just gently pinch the beans between your fingers. The skins rise to the top and then skim them off and you are ready. I do this with all beans including navy beans for bean soup. It is my understanding this helps to reduce flatulence as well 😉
I love your sense of humor! I laughed out loud! I’ll try the recipe because I love Hummus. Thank you ❤️
Oh thank you! I’m glad you got a kick out of it. I hope you love the hummus!